Best Non-Slip Stone Step Treads for UK Homes (2026)
Our tested picks for anti-slip stone and stone-effect step treads — for garden flights, front steps and wet British weather.
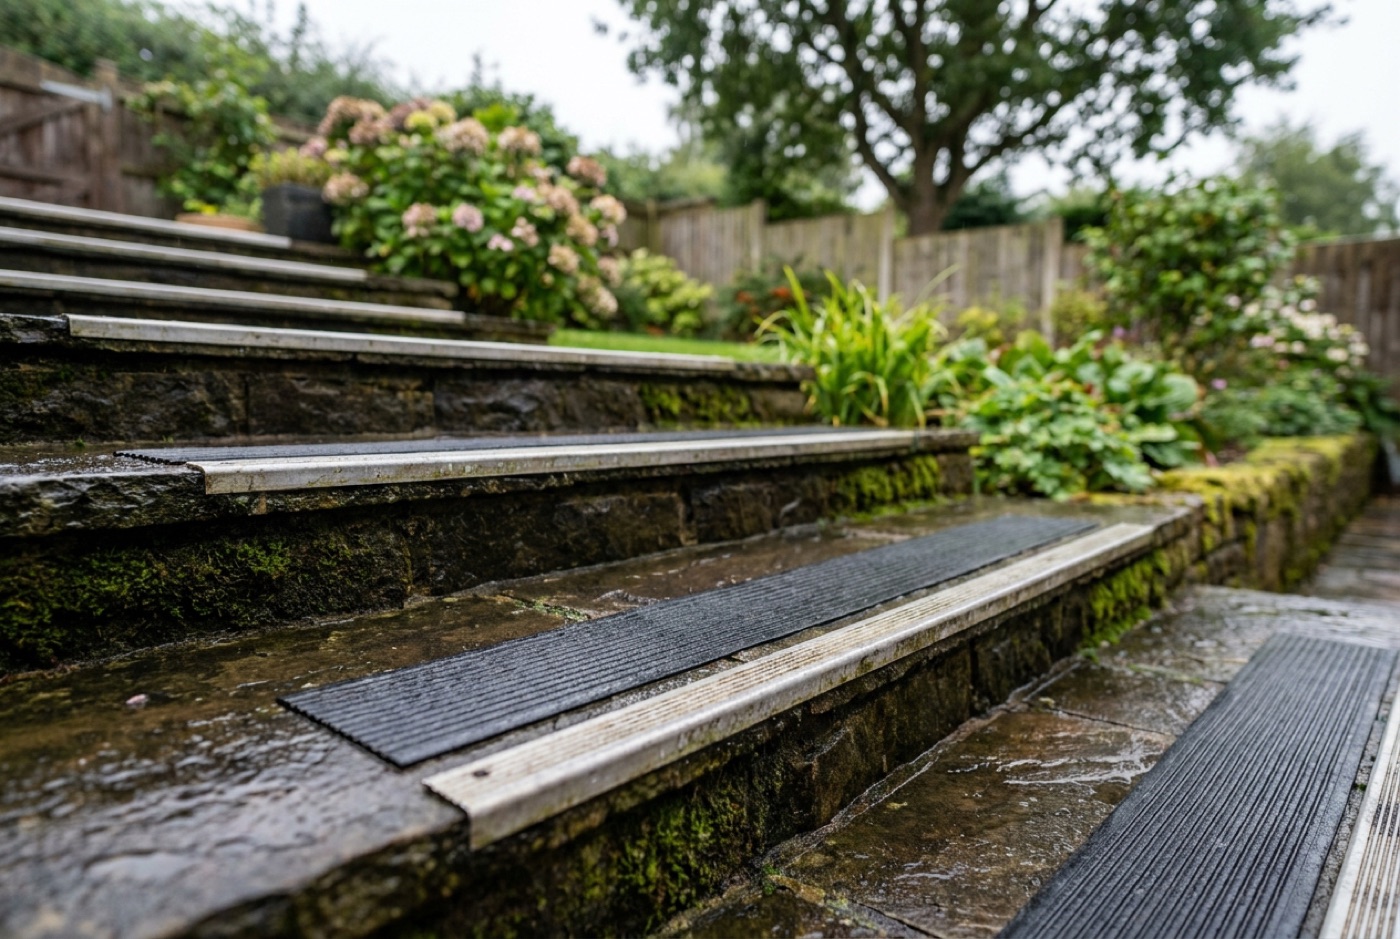
Wet stone steps are one of the most common slip hazards around a British home — a smooth flag glazes over with algae by the second autumn and turns treacherous. The fix is a proper non-slip tread: either a stone-effect tread with a textured surface, or an anti-slip insert you bond onto an existing step.
Below are the treads we rate most highly right now, why they made the list, and a quick comparison so you can jump straight to the right one for your job.
Our top picks at a glance
Best non-slip stone step treads — 2026
| # | Product | Best For | Our Rating | Link |
|---|---|---|---|---|
| 1Editor's Choice | Spurtar Rubber Bullnose Stair Treads (Set of 5) | Covering worn step edges | ★★★★★ | Check Price |
| 2 | Arbiton Aluminium Stair Nosing (40mm, Silver) | Retrofitting a grippy step edge | ★★★★★ | Check Price |
| 3 | GreenTec GRP Anti-Slip Strips (1000mm, Pack of 5) | Decking & patio steps | ★★★★★ | Check Price |
1. Spurtar Rubber Bullnose Stair Treads — best overall

Spurtar Rubber Bullnose Stair Treads (Set of 5)
- Heavy-duty rubber that wraps over the front edge of the step
- Weatherproof — rated for indoor and outdoor use
- Covers worn or slippery edges on wooden and stone steps alike
- Comes as a set of five, enough for a short flight
- Rubber look won't suit a period stone staircase
- Covers the nose and tread, not a full stone replacement
If your problem is a worn, slippery step edge rather than the whole tread, this is the one to beat. The bullnose shape wraps right over the front lip — the part people actually catch a heel on — and the heavy-duty rubber shrugs off wet British weather indoors or out. It’s the most versatile fix here: it works over tired timber and smooth stone alike, which is why it’s our default pick for most garden and front-step jobs.
2. Arbiton Aluminium Stair Nosing — best value

Arbiton Aluminium Stair Nosing (40mm, Silver)
- 1.2m aluminium profile screws straight onto the step edge
- Grippy anti-slip insert runs the length of the nose
- Fast, low-fuss retrofit for an existing flight
- Slim 40mm silver profile that stays out of the way
- Metal-and-insert look won't suit heritage stone
- Protects the front edge only, not the whole tread
When lifting sound steps isn’t on the table, a screw-down nosing is the pragmatic fix. This Arbiton profile fixes to the front edge — the part people actually slip on — and the anti-slip insert gives you a defined grippy line underfoot. At 1.2m per length it’s the quickest, most affordable way to make a tired step safe, which makes it our value pick for rentals and quick upgrades.
3. GreenTec GRP Anti-Slip Strips — best for patios & decking

GreenTec GRP Anti-Slip Strips (1000mm, Pack of 5)
- Heavy-duty GRP (fibreglass) built for long outdoor life
- Coarse grit surface holds grip in the wet
- Fixing screws included — straightforward to fit
- 1m strips, five to a pack, span decking and patio-level steps
- Screw-down fit suits timber and decking better than solid stone
- Gritty industrial finish is function over looks
Out on decking and low patio steps, a GRP strip is the workhorse. The fibreglass body and coarse grit face are made to sit outside for years and keep their bite when it’s raining, and the included screws make fitting straightforward. At a metre a strip with five in the pack, it’s the natural choice for spanning decking boards and patio-level steps where a full tread would be overkill.
How we chose
For step treads we weight three things above all: slip resistance when wet (the whole point), frost durability through freeze-thaw cycles, and fit — how easily the tread works with typical UK step dimensions. Looks and price break any ties. We don’t quote prices — they move constantly — so we point you to the retailer for the live price instead.
Anti-slip ratings explained: R-values and PTV
The single most confusing part of buying non-slip treads is the ratings, because there are two completely different systems and manufacturers quote whichever flatters their product. Here is what each one actually means and which to trust for outdoor UK steps.
The R rating (the ramp test)
The R rating (R9 to R13) comes from the German DIN 51130 “ramp test”, where a tester walks an oiled sample on an inclining ramp until they slip. The steeper the angle they can hold before losing footing, the higher the R number:
| R rating | Ramp angle | Typical use |
|---|---|---|
| R9 | 6–10° | Indoor, dry areas only — too smooth for steps |
| R10 | 10–19° | Kitchens, entrance halls, covered porches |
| R11 | 19–27° | Minimum for external steps and paths |
| R12 | 27–35° | Wet external areas, poolsides, ramps |
| R13 | 35°+ | Heavy-duty industrial, very steep gradients |
For garden steps, front steps and anything that gets rained on, R11 is the sensible floor and R12 is better on a steep flight or a shaded, algae-prone spot. Bear in mind the ramp test uses oil, not water, so the R number is a comparative guide rather than a real-world wet-slip figure — useful for ranking products, less so as an absolute guarantee.
The PTV / pendulum value (the one UK insurers trust)
The Pendulum Test Value (PTV), from the UK’s HSE and the UK Slip Resistance Group, is the measurement British risk assessors and insurers actually rely on. A weighted rubber slider swings across a wet surface and the friction is read off directly. The scale is simple:
- PTV 0–24 — high slip potential (dangerous when wet)
- PTV 25–35 — moderate slip potential
- PTV 36+ — low slip potential (the target for external steps)
Aim for PTV 36 or above on any tread, nosing or coating you fit outdoors. It is the figure a claims adjuster will ask for if someone ever slips, so if a product publishes a wet pendulum value at or above 36, that is stronger evidence than an R rating alone.
What to look for outdoors, in plain terms
- Prioritise the wet PTV (36+) over the R rating where both are quoted.
- On a shaded, north-facing or tree-covered flight — the spots that grow the most algae — step up to R12 / PTV 40+, because grip drops as the surface soils.
- A high rating only lasts while the surface is clean. Even the grippiest tread glazes over once algae and lichen take hold, so pair a good tread with routine cleaning — see how to clean stone steps and patios and how to remove moss and algae from steps.
How to fit each type of non-slip tread
The three product families above fit in three different ways. None is difficult, but each has a right method and a few pitfalls worth knowing before you start. As always, work on a dry day where possible and let any adhesive or sealant cure fully before the steps get used or rained on.
Bonding rubber and stone-effect treads
Full-cover treads like the Spurtar bullnose set are bonded, not screwed, which keeps the surface unbroken and avoids drilling into good stone.
- Clean and dry the step thoroughly. Sweep, scrub off any algae or grease, and let it dry completely — adhesive will not key to a damp or dusty surface. A moss-covered step must be cleared first.
- Dry-fit first. Lay the tread in place and check the bullnose sits flush over the front lip with an even overhang. Trim to width if needed.
- Apply a suitable exterior adhesive — a polyurethane grab adhesive or an MS-polymer construction sealant — in a zig-zag bead across the tread and a continuous bead just behind the nose.
- Press down firmly and weight it. Walk it flat, then leave something heavy on top while it cures (typically 24 hours; check the tube).
- Seal the front edge with a thin bead of the same sealant so water cannot track under the nose and lift it in a frost.
Screwing down aluminium and GRP nosings
Nosings like the Arbiton profile and the GreenTec GRP strips are mechanically fixed — the strongest, most permanent fit, but it means drilling.
- Mark and dry-position the profile flush with the front edge of the step, centred left to right.
- Mark the fixing holes, then drill pilot holes. Into solid stone or concrete you will need a masonry bit and wall plugs; into timber or composite decking, pilot holes alone.
- Bed the profile on a thin layer of exterior adhesive before screwing — this stops water sitting in the void under the metal and stops the profile drumming underfoot.
- Screw down with stainless or otherwise corrosion-resistant screws (ordinary steel will rust-streak the stone within a season).
- Countersink slightly so screw heads sit below the walking surface and don’t become trip or wear points.
Applying grip strips and anti-slip tape
Self-adhesive grip strips and tapes are the quickest fix of all, though they are the least durable outdoors and best treated as a stop-gap or an indoor solution.
- Clean, degrease and fully dry the tread — adhesion is everything with tape.
- Warm the surface and the tape on a cold day (a hair dryer helps); peel-and- stick adhesives grab poorly below about 10°C.
- Position 25–50mm back from the front edge, running parallel to it, then press down hard along the whole length with a roller or a block.
- Seal the cut ends on outdoor steps with a dab of sealant so water can’t get under a corner and start peeling it.
Non-slip coatings vs treads vs nosings
Which approach is right depends on how bad the problem is, whether you can drill the stone, and how the step needs to look afterwards. Here is how the three main routes compare.
| Approach | How it works | Best for | Lifespan outdoors | Look |
|---|---|---|---|---|
| Anti-slip coating | Grit-filled paint or invisible acid-etch treatment applied over the whole tread | Large areas, keeping the stone visible, tight budgets | 1–3 years (grit paint wears at traffic lines); etch treatments longer | Subtle to invisible; grit paints look painted |
| Full-cover treads | Rubber or stone-effect cover bonded over the existing step | Worn, uneven or slippery whole treads; hiding damage | 5–10 years | Modern; won’t suit period stone |
| Edge nosings / strips | Metal or GRP profile fixed along the front lip only | Sound steps where only the edge is the hazard | 10+ years (GRP/aluminium) | Defined grippy line; industrial |
A few rules of thumb:
- If the whole tread is smooth and slippery, a coating or a full tread solves it. If only the front edge catches people out, a nosing is cheaper, tidier and lasts longest.
- On heritage or listed stone, avoid drilling and avoid anything that changes the appearance — a clear penetrating anti-slip etch treatment is usually the only appropriate option, and you may need consent.
- Coatings are the least durable and need re-doing, but they are the only option that leaves the natural stone on show without covering it.
Whichever you pick, remember that on communal or access steps the underlying step geometry also has to be right — an even rise and going, and a graspable handrail where the drop warrants one. If you are building or altering a flight rather than just re-surfacing it, check whether the work is covered by garden steps building regulations before you start.
FAQ
Can I just paint anti-slip coating onto my existing stone steps?
You can, and it’s cheap, but grit-filled coatings wear at the edges and traffic lines and need re-doing every few years. A textured tread or a grit nosing lasts far longer. Coatings are the right call only when you want to keep the natural stone on show and can accept re-coating periodically.
What anti-slip rating should I look for outdoors?
For external steps in the UK, look for R11 or above on the ramp test, or — better — a wet PTV of 36 or more on the pendulum test. On shaded, algae-prone flights, step up to R12 / PTV 40+. Anything less can glaze over dangerously once algae builds up.
R rating or PTV — which one actually matters?
The PTV (Pendulum Test Value) is the one UK risk assessors and insurers rely on because it is measured on a wet surface, so favour it where both are quoted. The R rating is a useful comparative guide but is measured with oil on a ramp, so treat it as a ranking tool rather than a real-world wet-slip guarantee.
Do non-slip treads work if the steps are covered in moss and algae?
Only until the surface soils again. Even an R13 tread loses grip once a film of algae builds on top of it, so a tread is not a substitute for cleaning. Clear the growth first, fit the tread, then keep the steps clean — our guides on removing moss and algae and cleaning stone steps and patios cover doing this without damaging the stone.
Should I screw down a nosing or bond a full tread?
Screw down a nosing when the steps are sound and only the front edge is slippery — it’s the most durable, longest-lasting fix, though it means drilling. Bond a full-cover tread when the whole surface is worn, uneven or you’d rather not drill into good stone. On heritage or listed stone, avoid drilling altogether.
Will anti-slip treads and nosings survive a UK winter?
Good ones will. Look for rubber, aluminium or GRP rated for external use, and fix metal profiles with stainless screws so they don’t rust-streak the stone. The main failure mode is water tracking underneath and lifting the tread in a frost, so bed and seal the edges properly when you fit — that is what makes the difference between a fix that lasts one winter and one that lasts a decade.
Do I need building regulations for adding non-slip treads?
Simply re-surfacing existing steps with treads, nosings or a coating is maintenance and doesn’t trigger building control. Building a new flight or altering the rise and going is a different matter — see our guide to garden steps building regulations for when the rules apply.