How to Clean Stone Steps & Patios (Without Damaging the Stone)
How to clean stone steps and patios safely — the right method, what to use, pressure-washing dos and don'ts, and cleaning sandstone, York, slate and granite.
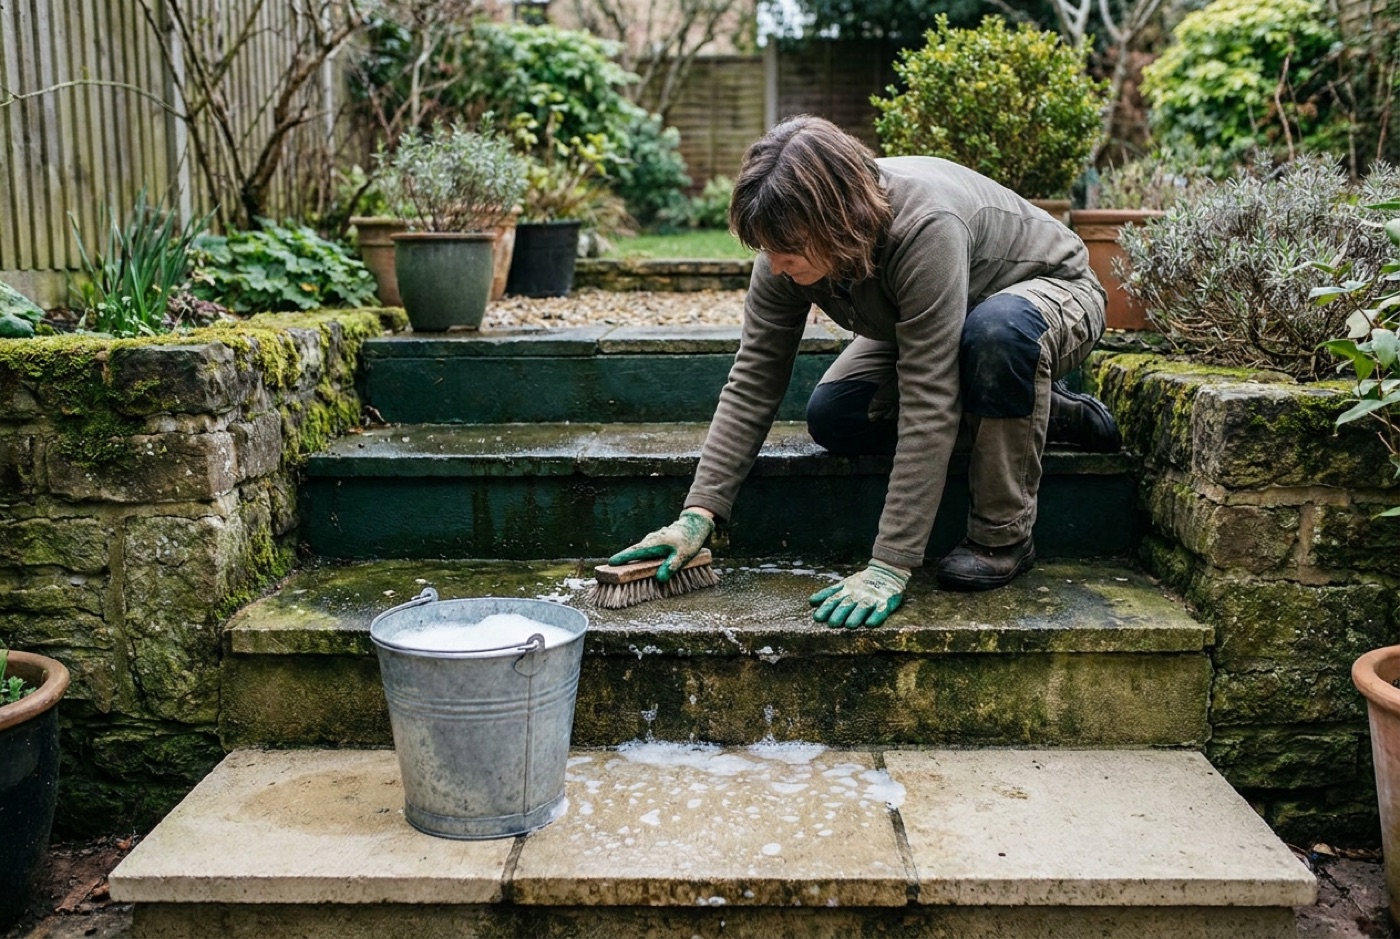
Knowing how to clean stone steps and patios properly is the difference between a surface that looks freshly laid and one that’s quietly being ruined. The green film, black spots and grimy joints aren’t just ugly — the algae that causes them is what makes steps dangerously slippery in an average British autumn. The good news is that natural stone cleans up beautifully with the right method, and the bad news is that the wrong method — the wrong chemical, or a pressure washer held too close — can pit soft stone, blow out the joints and leave permanent tide marks. This guide walks through the safe way to clean stone steps and patios, what to use and what to avoid, how to handle specific stones like sandstone, York, slate and granite, and how to stop the green coming back.
Why stone steps and patios go green, black and grey
Before you reach for a bottle of anything, it helps to know what you’re actually looking at — because the treatment differs.
- Green film (algae) — the most common problem. Algae is a plant that lives on moisture. Any damp, shaded, north-facing or poorly drained surface will grow it, and it’s what turns steps slippery. It’s also the easiest to remove.
- Black spots and streaks (lichen and gloeocapsa) — those stubborn black patches that laugh at a stiff brush are lichen or a dark biofilm. They root into the surface, so they take a proper biocide and patience rather than brute force.
- Grey-green crusty patches (lichen and moss) — moss grabs hold in joints and low spots where water sits. Our companion guide on removing moss and algae from steps covers the biological growths in more depth.
- General grime and dirt — soil splash, pollution, leaf tannins and foot traffic leave a dull grey film that washes off far more easily than the biological stuff.
- White chalky bloom (efflorescence) — not dirt at all. It’s mineral salts migrating out of the stone or the mortar bed with water and drying on the surface. Scrubbing with water can make it worse; it usually needs a dedicated efflorescence remover or simply time and dry weather.
Getting the diagnosis right saves you money and effort. A green patio needs a wash and a biocide; a white bloom needs something else entirely.
The safe cleaning method, step by step
For a routine clean of a green or grimy natural stone patio and steps, this gentle method does 90% of the job without risking the stone. Work top to bottom on a flight so dirty water always runs down onto surfaces you haven’t cleaned yet.
1. Clear and sweep first
Lift pots and furniture, and sweep the whole surface with a stiff broom to remove loose leaves, moss and grit. Cleaning over grit just scratches the stone. Pull any weeds out of the joints by hand or with a weeding knife.
2. Wet the stone and let it soak
Soak the surface with plain water and leave it a few minutes. Pre-wetting stops a porous stone drinking in your cleaning solution too fast and leaving patchy tide marks — this single step prevents most “why is it streaky now?” disasters.
3. Apply a suitable cleaner
Use a dedicated patio cleaner or a mild solution (see the next section on what’s safe). Spread it evenly with a watering can or a low-pressure sprayer and give it the dwell time the label states — usually 10–20 minutes. Don’t let it dry on the surface; keep it damp.
4. Agitate with a stiff brush
A stiff-bristled deck brush — not a wire brush, which scratches — and a bit of elbow grease lifts the loosened algae and grime. Scrub along the same direction on each slab. For carved edges, step nosings and joints, a smaller hand brush gets into the detail.
5. Rinse thoroughly
Rinse everything off with clean water, working top to bottom, until the run-off runs clear. Any cleaner left in the joints can bleach the mortar or feed a fresh tide mark, so rinse more than you think you need to.
6. Let it dry and assess
Let the stone dry fully, then look again in daylight. A first clean often reveals stubborn black lichen spots that need a targeted biocide, or highlights joints that need repointing. Deal with those before you seal.
Pressure washing: dos and don’ts
A pressure washer is fast and satisfying, and on hard, dense stone it’s genuinely useful. But it’s also the single biggest cause of ruined patios we see, because soft or aged stone can’t take the force. Handled carelessly, a jet wash pits the surface, strips the sealer, blasts jointing mortar clean out, and etches “zebra stripes” into the stone that never fully fade.
If you do use one:
- Test on a hidden corner first, especially on sandstone, limestone or reclaimed stone.
- Use a fan tip, never a pin-point/turbo jet on natural stone — the concentrated jet is what carves stripes.
- Keep the nozzle at least 30cm from the surface and hold it at a shallow, consistent angle. Never linger in one spot.
- Keep the whole surface evenly wet as you work so you don’t leave patches at different “cleanliness” that show as banding.
- Expect to re-point the joints and re-seal afterwards — jet washing removes both.
Don’t jet wash if:
- The stone is soft, flaky, spalling or reclaimed — you’ll take the face off it.
- The joints are lime mortar, sand-brushed or already loose.
- You only have a green film. A biocide and a stiff brush achieve a better, longer- lasting result with none of the risk, because chemistry kills the algae at the root rather than just blasting off the top layer that regrows in weeks.
Honestly, for most stone steps a garden hose, a good patio cleaner and a stiff brush beat a pressure washer for both safety and longevity.
What’s safe to use — and what isn’t
This is where a lot of stone gets damaged. Here’s the plain-English verdict on the common options.
| Product | Safe on natural stone? | Notes |
|---|---|---|
| Dedicated pH-neutral patio cleaner | Yes — best choice | Formulated for stone; lifts dirt without etching. Follow the dilution. |
| Sodium hypochlorite (patio “biocide”/mould killer) | Use with care | Kills algae and lichen effectively. Can lighten stone and kill nearby plants — dilute, rinse well, protect borders. |
| Household bleach | Only diluted, with caution | Similar to the above but harsher and unbuffered. Can bleach colour and damage jointing; rinse thoroughly. |
| White vinegar / acidic cleaners | No — avoid | Acid etches and dulls limestone, York and other calcium-based stone. Never use on natural stone steps. |
| Patio brick acid / hydrochloric acid | No — specialist only | Strips the surface of most stone; for efflorescence use a proper buffered remover, not neat acid. |
| Washing-up liquid | Mild grime only | Fine for a light wash, but leaves a residue that can get slippery — rinse well. |
| Wire brushes / metal scourers | No | Scratch the surface and leave iron specks that rust into orange spots. |
The headline rules: never put acid on limestone, York or any soft calcium-based stone, always dilute and rinse a hypochlorite biocide, and when in doubt reach for a purpose-made pH-neutral patio cleaner. A dedicated patio cleaner for the grime plus a separate biocide for the biological growth is the combination the professionals use.
How to clean specific stones
Different stones want different handling. Here’s how we’d approach each.
Indian sandstone and other sandstones
Sandstone is porous and relatively soft, so it’s the one people damage most. Stick to a pH-neutral patio cleaner and a stiff brush, and go gentle with any pressure washer (fan tip, well back). Sandstone shows tide marks readily, so pre-wet thoroughly and rinse evenly. Because it’s so absorbent, sealing after cleaning makes a huge difference to how fast the green returns — see our Indian sandstone guide and our pick of sealers for Indian sandstone steps.
Limestone
Limestone is calcium-based, which means acid is its enemy — no vinegar, no brick acid, no acidic “descaler” cleaners, ever, as they’ll etch dull marks that can’t be polished out. Use only pH-neutral or gently alkaline cleaners and a soft- to-medium brush. It scratches, so avoid wire brushes and turbo nozzles completely.
York stone
Traditional Yorkstone is a hard-wearing sandstone, tougher than most Indian stone but still worth treating gently — reclaimed York in particular can be flaky and weathered. A pH-neutral cleaner, a biocide for the black lichen it tends to attract, and a stiff brush is all it needs. Keep pressure washers well back on old York. Our York stone steps and paving guide has more on living with this classic material.
Slate
Slate is dense and doesn’t absorb much, so it cleans easily with a pH-neutral cleaner and a brush. Watch two things: avoid harsh acids (they can dull the surface and draw out iron staining), and go carefully with a pressure washer as slate can flake along its natural layers if you catch an edge. A colour- enhancing sealer afterwards brings back the deep, wet-look tones slate is prized for.
Granite
Granite is the hardest and least porous of the common step stones, so it’s the most forgiving to clean. A pH-neutral cleaner and a brush handle almost anything, and it tolerates pressure washing better than softer stone (still use a fan tip and common sense). Its low porosity means it stays cleaner longer and rarely stains, which is a big part of why it’s such a durable choice for garden steps.
Cleaning the joints and edges
The joints between slabs and the step nosings are where dirt, moss and slime collect first, and they make the whole flight look tired even when the slabs are clean.
- Brush the biocide into the joints and let it work — that kills the moss at the root rather than just scraping the green off the top.
- Rake out any crumbling or missing mortar and repoint it. Open joints let water under the slabs, which is how steps come loose and heave. Our guide to repointing stone steps and walls covers the mortar mix and method.
- On step edges, clean the vertical riser as well as the flat tread — a grubby riser is what makes a swept staircase still look neglected.
How to stop it coming back: seal and maintain
Cleaning is only half the job. Bare, porous stone soaks up the rainwater that algae feeds on, so it’ll be green again within a season or two if you leave it. The fix is to seal the stone once it’s clean and fully dry.
A good impregnating sealer keeps water out, which starves the algae, blocks stains and dramatically slows regrowth — meaning your next clean is a quick brush rather than a weekend’s work. Read our best stone sealers for steps guide to choose the right one, and note that on flat treads you want a natural (matt) finish rather than a glossy wet-look, which can be slippery underfoot.
A simple maintenance routine keeps it easy:
- Sweep regularly, especially in autumn — wet leaves are what stain stone and feed algae.
- Apply a biocide once or twice a year on shaded surfaces to keep the green at bay before it takes hold.
- Re-seal every 3–5 years, or when water stops beading and starts soaking in.
- Keep drainage clear so water isn’t pooling on treads and in joints.
Do that and a proper deep clean becomes a once-every-few-years job rather than a constant battle.
FAQ
What is the best thing to clean stone steps with?
For everyday cleaning, a pH-neutral patio cleaner with a stiff-bristled brush is the safest and most effective choice on all natural stone. For green algae and black lichen, add a sodium hypochlorite patio biocide, diluted and rinsed well. Avoid acids and wire brushes, which damage the stone.
Can I use a pressure washer on natural stone steps?
You can on hard, dense stone like granite or fresh York, but only with a fan tip held at least 30cm back — never a pin-point turbo jet. On soft, flaky or reclaimed stone, and on sandstone or limestone, a pressure washer risks pitting the surface and blasting out the joints. For a simple green film, a biocide and a brush give a better, longer-lasting result with no risk.
Does vinegar clean stone patios?
No — don’t use vinegar on natural stone. Vinegar is acidic, and acid etches and dulls limestone, York and other calcium-based stone permanently. It’s also weak against established algae. Use a proper pH-neutral cleaner and a biocide instead.
How do I get black spots off my patio?
Black spots are lichen or a dark biofilm rooted into the surface, so a brush alone won’t shift them. Apply a sodium hypochlorite-based patio biocide, leave it the full dwell time, scrub and rinse. It often takes a second treatment, and the spots may fade over a few days after the biocide keeps working rather than vanishing instantly.
How often should I clean and seal my stone steps?
Give steps a light sweep and wash a few times a year, a biocide once or twice a year on shaded areas, a proper deep clean roughly every couple of years, and re-seal every 3–5 years. Sealing is what makes the whole routine easier — clean, sealed stone stays clean far longer.
Will cleaning damage my patio sealer?
Aggressive cleaning can. A pressure washer and harsh acids will strip a sealer, so after any heavy clean you should assume you’ll need to re-seal. A gentle wash with a pH-neutral cleaner is fine on sealed stone. Either way, once the stone is clean and dry, re-sealing restores the protection and locks out the water that causes the problem in the first place.