How to Repoint Stone Steps & Walls (Mortar Mix & Method)
How to repoint stone steps and walls: when joints need it, raking out old mortar, the right lime vs cement mix, the pointing method and curing.
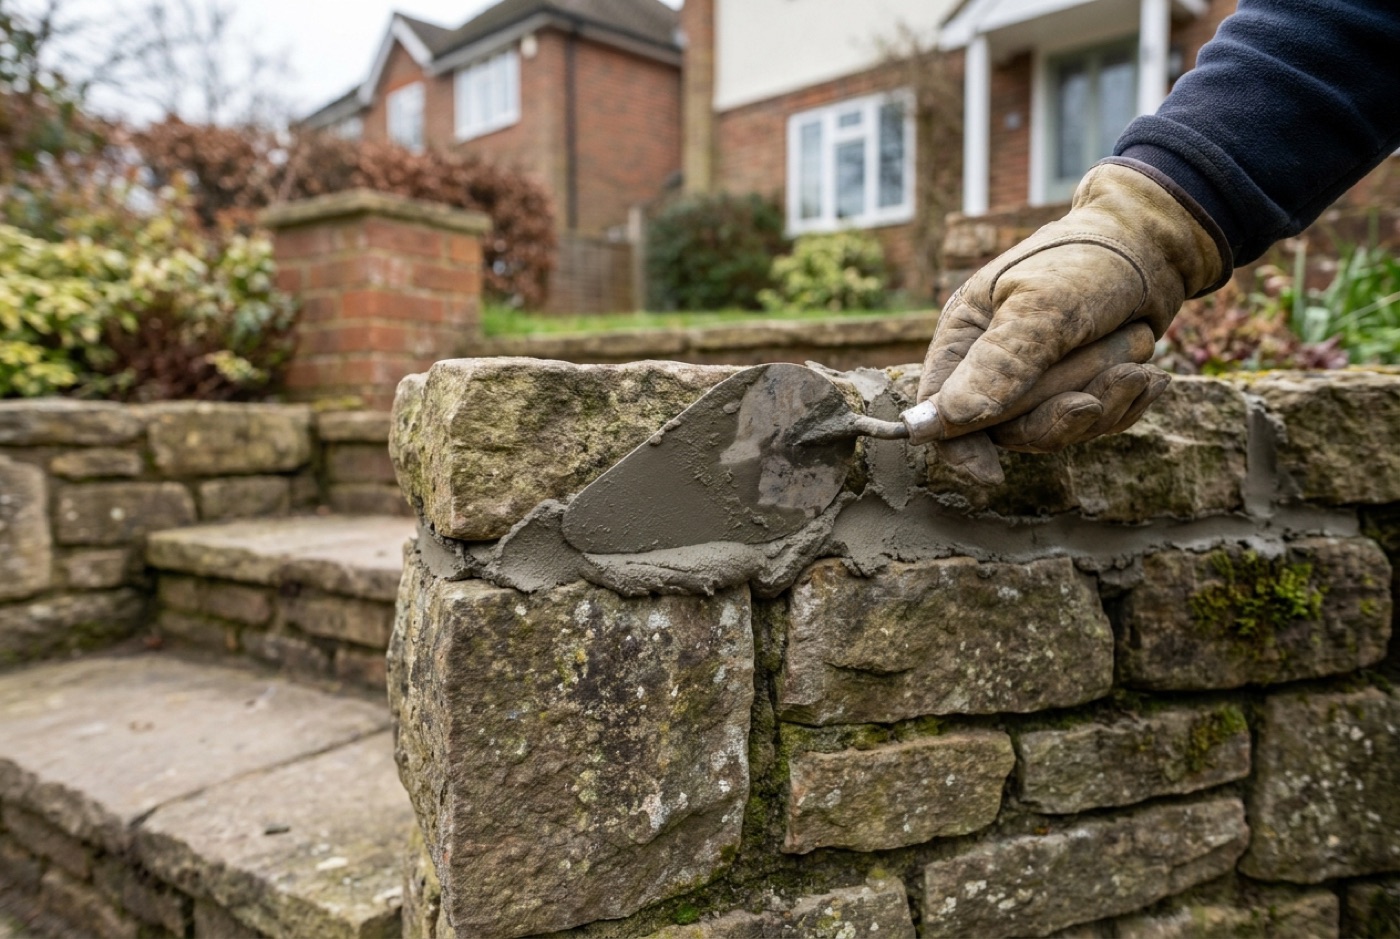
Repointing stone — raking out tired old mortar and replacing it with fresh — is one of the most useful skills you can learn if you own stone steps or a stone garden wall. Done well, repointing stone keeps water out of the joints, stops frost prising the structure apart, and makes a weathered flight or wall look decades younger. Done badly — with the wrong mix, or a cement so hard it traps moisture inside soft stone — it can quietly cause the very damage it was meant to prevent. This guide walks through when joints actually need repointing, how to rake out the old mortar without wrecking the stone, how to choose between lime and cement mortar and get the ratios right, the pointing method itself, and how to cure and finish so the work lasts. It’s a genuine weekend job for a patient DIYer.
What is repointing, and why does it matter?
The mortar joints between stones do more than fill gaps. They spread load evenly, lock the stones together, and — crucially — they’re designed to be the sacrificial layer. Mortar is meant to weather, crack and eventually fail before the stone does, because mortar is far cheaper and easier to replace than the stone itself. When joints crumble, they stop doing their job:
- Water gets in. Open joints let rain track behind the face of a wall or under the treads of a step. In a British winter that water freezes, expands, and levers stones loose — the same freeze-thaw cycle that potholes roads.
- The structure loosens. On steps this shows up as treads that rock or slide; on walls, as bulging courses and stones you can wobble by hand.
- It looks neglected. Nothing ages a stone feature faster than gaping, mossy, crumbling joints.
Repointing simply removes the failed mortar to a sound depth and packs in fresh mortar to restore the seal and the bond. It’s routine maintenance, not a rebuild — but if you ignore it long enough, a rebuild is exactly what you’ll end up paying for. If stones are already loose, cracked or sunken, deal with that first; our guide to repairing cracked, chipped or sunken stone steps covers the structural fixes that should come before any cosmetic pointing.
When do joints actually need repointing?
Not every hairline gap needs attention. Repoint when you see the signs that joints have genuinely failed, not just aged. Walk the flight or the wall and look for:
- Mortar you can rake out with a screwdriver — if it’s soft, sandy or crumbles to dust under light pressure, it’s done.
- Joints that have receded more than about 6mm behind the face of the stone, leaving a shadow gap that holds water and moss.
- Missing sections where mortar has fallen out completely and you can see into the joint.
- Cracked or drummy pointing that has separated from the stone — tap it and it sounds hollow, or a whole ribbon lifts away.
- Persistent damp, moss or plant growth rooting into the joints, which both signals and worsens the failure.
- Loose or rocking stones — though these usually need re-bedding, not just repointing.
If the mortar is sound, well-bonded and only lightly weathered, leave it alone. Over-eager repointing of joints that don’t need it does more harm than good, especially on old walls, because every rake-out risks chipping the stone. A good rule: if you can’t easily pick the mortar out, it doesn’t need replacing yet.
Tools and materials
You don’t need much, and most of it you may already own:
- Plugging chisel or a thin cold chisel and a club (lump) hammer for raking out by hand — the safest method on soft or old stone.
- Angle grinder with a thin diamond blade (optional, for hard cement mortar only) — fast, but risky near the stone; see the caution below.
- Pointing trowel and a small hawk to carry mortar.
- Pointing iron or jointer (or a bit of bent copper pipe/hosepipe) to strike and shape the joints.
- Stiff-bristled brush (not wire) and a soft brush for finishing.
- Bucket, mixing board or tub, and a pointing gun if you want to reduce mess.
- Materials: sand, and your chosen binder — hydraulic lime (e.g. NHL 3.5) or cement, plus hydrated lime if you’re making a cement:lime:sand mix.
- PPE: goggles, a dust mask (silica dust from raking out and cutting is a real hazard), and gloves — lime and cement are both caustic.
Work in dry, mild weather. Never repoint in frost or when frost is forecast within a few days, and avoid baking sun, which flash-dries the mortar before it can cure.
Raking out the old mortar
This is the stage where impatience causes damage, so slow down. The aim is to remove all the failed mortar to a sound depth of at least 15–20mm (roughly twice the joint width) so the new mortar has enough of a “key” to grip and won’t just be a thin skim that pops off.
- Rake by hand where you can. Work a plugging or thin cold chisel along the joint, angled into the mortar, never towards the stone. Tap gently with the hammer and let the tool find the soft mortar. Rake the horizontal (bed) joints as well as the vertical (perp) joints.
- Go deep enough, and no deeper. Clear back to firm mortar. If the joint is deep and hollow, pack the back later — don’t chase it endlessly.
- Keep the joint square, not feathered. You want clean, roughly parallel edges so the new mortar sits in a proper square-ended joint, not a shallow V that sheds the pointing.
- Mind the arrises (edges) of the stone. Chipping the crisp edge of a step nosing or a wall coping is the classic repointing scar. This is exactly why hand tools beat power tools on old stone.
A serious word on angle grinders. A grinder is quick through hard modern cement pointing, but on stone it’s dangerous: one slip and you’ve cut a permanent groove across the face of the stone, and the disc easily widens the joint or skates onto soft stone and dishes it. If you must use one to break up rock-hard cement, run it only down the centre of wide joints, finish the edges by hand, and accept the huge dust cloud (mask up — this is where silica exposure is worst). On soft sandstone, limestone or reclaimed stone, don’t use a grinder at all.
Once raked out, brush every joint clean of dust and loose grit, then dampen the joints with clean water (a spray or a brush). Dry, dusty stone sucks the water out of fresh mortar instantly, which stops it curing and leaves a weak, powdery joint — the single most common reason repointing fails.
The right mortar mix: lime vs cement
This is the decision that separates a repair that lasts from one that slowly wrecks the stone, so it’s worth understanding rather than just grabbing a bag of anything.
The golden rule: never harder than the stone
The mortar must be softer and more permeable than the stone it sits between. Two reasons:
- Movement. Mortar should flex and absorb small structural movements so the hard, brittle stone doesn’t crack. A rigid cement joint transfers all that stress into the stone.
- Moisture. Walls always take up some water. Traditionally, that moisture evaporates out through the soft mortar joints. A hard, dense cement pointing seals the joints and forces the moisture to leave through the stone face instead — and as it evaporates it deposits salts and freezes there, spalling and crumbling the face of the stone. This is why so many old buildings repointed with cement in the 1970s now have blown, dished stone either side of perfect-looking cement joints.
The failure is slow and invisible for years, which is exactly why people keep making it. On any old, soft or historic stone — soft sandstone, limestone, reclaimed York, anything on a period property — use lime mortar, not cement.
Lime mortar (best for old, soft and porous stone)
The simplest robust choice for most garden steps and walls is a natural hydraulic lime (NHL) mortar. It sets by a slow chemical reaction, stays breathable, and is forgiving.
- NHL 3.5 : sharp sand — roughly 1 : 2.5 to 1 : 3 is a sound general-purpose mix for exposed garden work.
- Use NHL 2 for softer, more sheltered stone and NHL 5 where exposure and loading are higher (retaining walls, exposed copings, high-traffic steps).
- Lime putty mixes are more traditional still but need more skill and much longer curing; NHL is the practical DIY route.
Lime is more breathable and more sympathetic to old stone, but it cures slowly and must be protected from rain, frost and fast drying while it does (see curing below).
Cement mortar (only for hard stone and modern work)
Cement mortar is stronger and sets faster, but it’s only appropriate on hard, dense, non-porous stone — granite, some engineered stone, and matching modern work where cement was already used. Even then, add lime to soften it and improve workability and breathability:
- 1 part cement : 1 part hydrated lime : 5–6 parts sand is a good, semi-flexible mix (a “1:1:6”). The lime stops it setting bone-hard.
- Avoid a straight strong sand-and-cement (3:1 or 4:1) for pointing stone — it’s too hard and impermeable and will damage anything softer than granite over time.
Quick reference
| Stone / situation | Recommended binder | Typical mix (binder : sand) |
|---|---|---|
| Soft sandstone, limestone, reclaimed York | Hydraulic lime | NHL 3.5, 1 : 3 (or NHL 2 for very soft) |
| Old / period / historic stonework | Lime (NHL or putty) | NHL 2–3.5, 1 : 2.5–3 |
| Exposed retaining wall or coping | Stronger hydraulic lime | NHL 5, 1 : 2.5 |
| Hard granite, modern hard stone | Cement + lime | 1 : 1 : 6 (cement : lime : sand) |
| Matching existing cement pointing | Cement + lime | 1 : 1 : 6, colour-matched |
Whatever you mix, match the colour and sand to the existing joints where you’re only patching — mortar colour comes mostly from the sand, so take a sample to a builders’ merchant. Mix to a firm, “moist earth” consistency that holds its shape and isn’t sloppy; wet mortar slumps out of the joint and shrinks as it dries.
The pointing method, step by step
With the joints raked out, cleaned and dampened, and your mortar mixed to a firm consistency, you’re ready to point. Work a small area at a time — mortar is easier to strike when it’s started to firm up, and you don’t want it drying on the hawk.
1. Load the joint
Take a small amount of mortar on the pointing trowel or hawk. Press it firmly into the joint with the trowel or a jointing tool, pushing it right to the back and working it in so there are no voids. Fill vertical joints and horizontal joints, and don’t be shy about compacting it — well-compacted mortar is denser, stronger and sheds water. A pointing gun makes deep or narrow joints far easier and neater.
2. Fill flush, then leave it to firm up
Fill the joint flush with, or very slightly proud of, the stone face. Then wait. Mortar tooled while it’s still wet smears and slumps; mortar left until it’s “thumbprint firm” (dents under firm pressure but doesn’t stick to your finger) strikes cleanly. This is usually anywhere from 20 minutes to a couple of hours depending on weather.
3. Strike (shape) the joint
Once firm, use a pointing iron or jointer to compress and shape the joint. The profile matters for weathering:
- Weather-struck / bucket-handle (slightly recessed, concave): best for most exposed steps and walls. It compacts the surface and sheds water outward.
- Flush: neat and traditional on many stone walls; fine in sheltered spots.
- Avoid proud, “ribbon” or raised pointing that stands out from the stone — it ledges water and looks wrong on natural stone, and it’s a giveaway of an amateur cement job.
Aim to finish the mortar just below the arris of the stone, so the stone stands slightly proud and the joint is a hair recessed. Never smear mortar across the face of the stone.
4. Brush off
When the struck joint has firmed a little more, lightly brush across the joints with a soft, dry brush to remove crumbs and give a consistent texture. Brush along the joint, not out onto the stone. Clean any mortar off the stone face promptly with a damp (not wet) sponge before it stains — this is much harder once it’s cured.
Curing: the step everyone rushes
Fresh mortar — lime especially — needs to cure slowly and stay damp. Rush this and you get weak, dusty, cracked joints no matter how good your mix was.
- Keep it damp for several days. Mist the new pointing with clean water once or twice a day for the first 3–5 days if the weather is dry or breezy. This is essential for lime and beneficial for cement mixes too.
- Protect from rain and sun. Hang damp hessian or a breathable sheet over fresh lime work — never trap it under polythene tight against the joints, which stops it breathing. Shade it from strong direct sun.
- Absolutely no frost. Frost destroys uncured mortar. Don’t point if frost is forecast within about a week, and cover the work overnight if temperatures might dip.
- Be patient. Cement mortar handles light use after 24–48 hours; lime is far slower and gains full strength over weeks to months. On steps, keep foot traffic off newly pointed joints for as long as you practically can.
If you’re pointing steps you’ve just built or re-bedded, let the bedding mortar set before you point the joints — the sequence and timings in our guide to laying stone garden steps apply here too.
Common repointing mistakes to avoid
Most repointing failures come down to the same handful of errors. Steer clear of these and you’ll get a joint that lasts:
- Using too-hard cement on soft or old stone. The number-one mistake. A rigid, impermeable cement joint traps moisture and spalls the stone face. When in doubt, point in lime.
- Not raking out deep enough. A thin skim over old mortar has nothing to grip and pops off within a season. Get back to a sound 15–20mm.
- Pointing onto dry, dusty joints. The stone drinks the water out of the mortar and it never cures. Always brush clean and dampen first.
- Mortar too wet. Sloppy mortar slumps, shrinks, cracks and stains the stone. Mix firm.
- Tooling too soon. Striking wet mortar smears it and weakens the surface. Wait for thumbprint-firm.
- Smearing mortar across the stone face or leaving proud “ribbon” pointing — both look amateur and shed water badly. Keep joints recessed and stone faces clean.
- Working in frost or blazing heat, or failing to keep the work damp while it cures. Weather is half the battle.
Repointing steps vs walls: what’s different
The mix and method are the same, but a few things change depending on what you’re pointing.
- Steps take direct wear and standing water, so favour a well-compacted, slightly recessed weather-struck joint and get the fall on the treads right so water runs off rather than sitting in the joints. Loose or rocking treads need re-bedding first, not just pointing.
- Retaining and garden walls face weathering and, sometimes, ground pressure. Copings and the top course take the worst of the rain, so point those especially well — most wall failures start at the top and work down. For design and build context, our garden wall ideas guide covers the types of stone wall and how they’re put together.
- Reclaimed and very old stone is soft and irregular; stick to lime, rake out gently by hand, and expect wider, more forgiving joints.
FAQ
What is the best mortar mix for repointing stone?
For most stone steps and garden walls — and anything old or soft — a natural hydraulic lime mortar (NHL 3.5) at about 1 part lime to 3 parts sharp sand is the best all-round choice, because it stays breathable and flexible. Use cement only on hard, dense stone like granite, and even then soften it with lime (a 1:1:6 cement:lime:sand mix). The overriding rule is that the mortar must be softer and more permeable than the stone.
Can I use ordinary sand and cement to repoint stone?
You can on hard granite or modern hard stone, but you should not use a strong straight sand-and-cement mix on soft or old stone. Cement pointing is too hard and impermeable, so it traps moisture and, over the years, spalls and crumbles the face of softer stone. Add hydrated lime to the mix, or better, use a hydraulic lime mortar instead.
How deep should I rake out the old mortar?
Rake back to sound, firm mortar and at least 15–20mm deep — roughly twice the width of the joint — so the new mortar has enough depth to key in and grip. A shallow skim over crumbling mortar has nothing to bond to and will fall out quickly. Keep the joint edges square rather than feathered.
Should I repoint with lime or cement?
Use lime for old, soft, porous or reclaimed stone and any period stonework — it’s breathable, flexible and sympathetic to the stone. Use cement (softened with lime) only for hard, dense stone like granite or to match existing modern cement pointing. If you’re unsure what the stone is, lime is the safer default because it won’t damage anything.
How long does repointing take to cure?
Cement-based mortar takes light traffic after 24–48 hours and gains most of its strength within a month. Lime mortar cures much more slowly, hardening over weeks to several months, and must be kept damp and protected from rain, sun and frost for the first few days. Either way, keep the new joints damp for 3–5 days and don’t point if frost is forecast.
Can I repoint stone steps myself?
Yes — repointing is one of the more achievable stone-maintenance jobs for a confident DIYer, needing patience more than specialist skill. Rake out the failed mortar by hand, match a suitable lime or cement mix, pack the joints firmly, strike them once firm, and keep the work damp while it cures. If stones are loose, cracked or sunken, though, fix the structure first using our guide to repairing stone steps.