Best Sealer for Indian Sandstone Steps & Paving (UK, 2026)
The best sealers for Indian sandstone steps and paving — impregnating vs wet-look, matt natural finishes, stopping efflorescence, and our top UK picks.
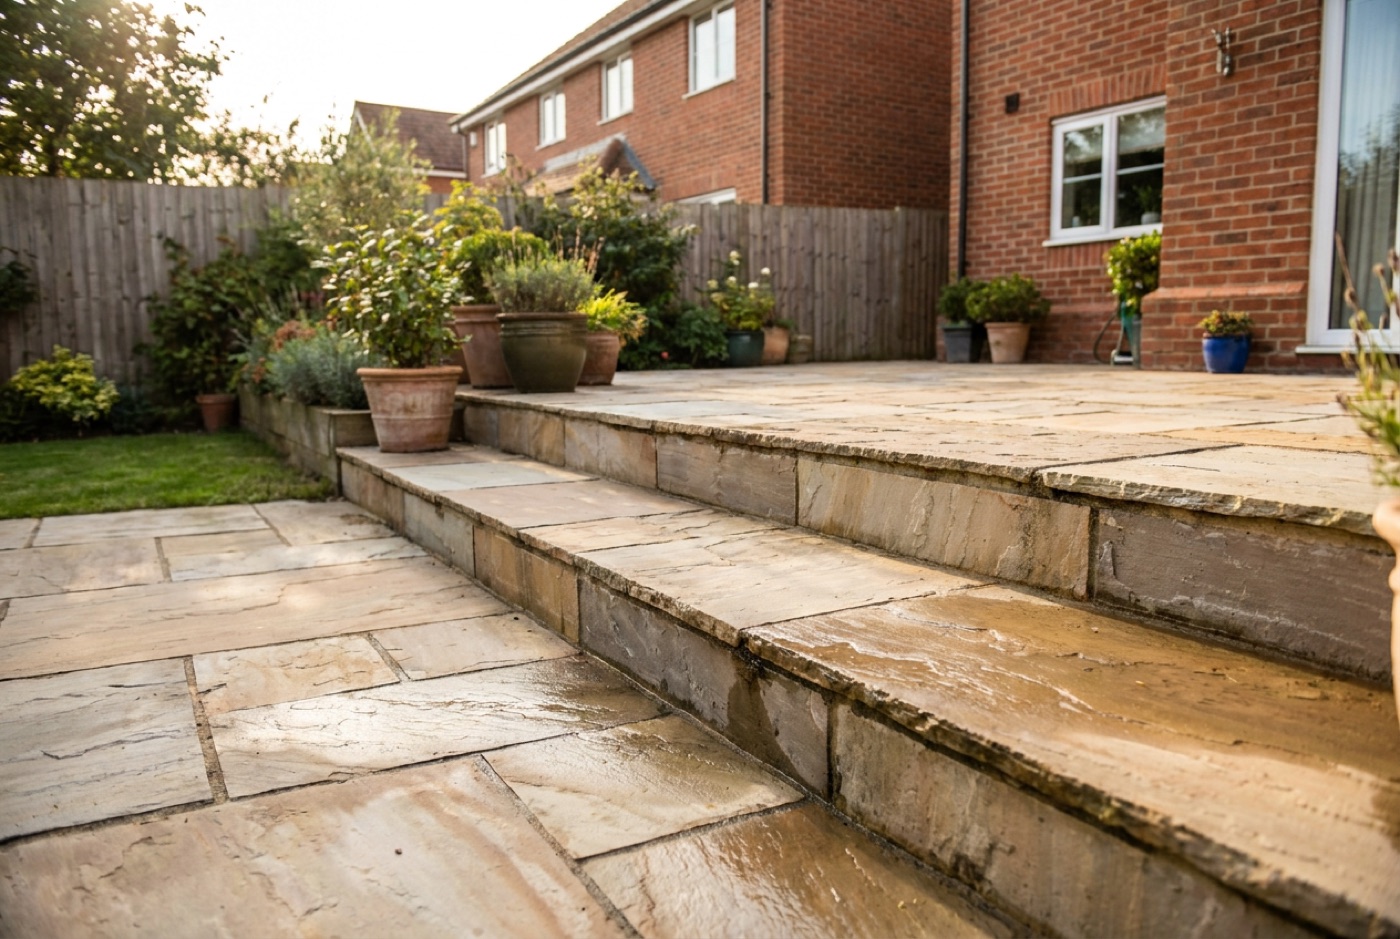
Indian sandstone is the most popular paving in Britain for one reason: it looks lovely and it’s cheap. But it’s also porous — far more so than granite or porcelain — and that porosity is exactly why it needs sealing. Left bare, Indian sandstone drinks up rainwater, which feeds the green algae that turns steps slippery by the second autumn. It stains readily from leaves, moss and spilled drinks, and it’s prone to efflorescence — that chalky white bloom that surfaces as salts inside the stone migrate out with the water. A good sealer slows all of this: less water in the stone means less algae, fewer stains and a much lower risk of frost damage over winter. Here are the sealers we’d reach for, and how to pick the right finish for steps specifically.
Impregnating vs wet-look vs colour-enhancing — which do you need?
The finish matters more on steps than anywhere else, because the tread is a surface people put their full weight on in the wet.
- Impregnating (penetrating) sealers soak into the stone and protect from within. They leave a matt, natural finish and — crucially — don’t change the underfoot grip. This is the safe default for tread surfaces.
- Wet-look sealers sit on or near the surface and deepen the colour to a rich, just-rained look. Gorgeous on the right project, but a film-forming wet-look can make a wet tread noticeably more slippery. Keep it off the flat treads people walk on.
- Colour-enhancing (matt) sealers are a middle ground: they richen the colour like a wet-look but dry to a low-sheen or matt finish, so they’re kinder to grip than a full gloss.
Our rule for steps: use an impregnating or matt colour-enhancer on the flat treads, and save any glossy wet-look for the vertical risers, surrounding walls and paving borders where nobody’s standing. If grip is your main worry, read our companion guide to non-slip stone step treads.
Our top picks at a glance
Best sealers for Indian sandstone steps & paving — 2026
| # | Product | Best For | Our Rating | Link |
|---|---|---|---|---|
| 1Editor's Choice | Indian Sandstone Sealer (5L, Natural Finish) | Everyday natural-look protection | ★★★★★ | Check Price |
| 2 | Indian Sandstone Sealer & Colour Intensifier (5L) | Richer colour on risers & walls | ★★★★☆ | Check Price |
| 3 | Pro-Kleen Ultimate Indian Sandstone Sealer (5L, Matt) | Whole-patio jobs | ★★★★☆ | Check Price |
| 4 | Sika Path & Patio Sealer (5L) | Damp, algae-prone steps | ★★★★★ | Check Price |
1. Indian Sandstone Sealer (Natural Finish) — best overall
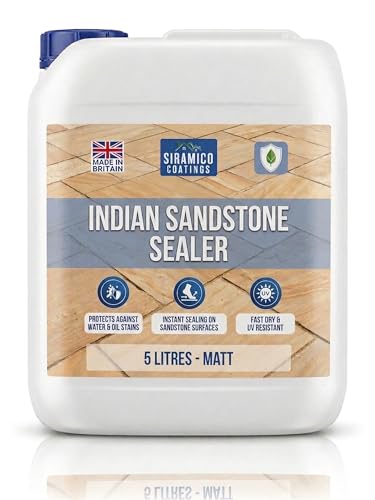
Indian Sandstone Sealer (5L, Natural Finish)
- Impregnating, natural-finish formula made specifically for Indian sandstone
- Keeps the stone's natural look and underfoot grip — no gloss film
- One 5L tin covers roughly 50m², enough for a typical patio and flight of steps
- Weatherproofing the maker rates at up to around 10 years
- Won't deepen or enrich the colour — this is a keep-it-as-is sealer
- Needs a genuinely dry spell to apply and cure
For sealing Indian sandstone steps this is our default. It soaks into the stone and protects against water, algae and staining without changing the appearance or making treads slick — exactly what you want on a surface people walk on. The natural finish keeps the matt look and the grip, coverage is generous at around 50m² a tin, and the stated protection runs to about a decade before you’d think about re-doing it. If you buy one sealer for a flight of sandstone steps, this is the one.
2. Indian Sandstone Sealer & Colour Intensifier — best colour-enhancing

Indian Sandstone Sealer & Colour Intensifier (5L)
- Deepens and enriches the buff, grey and multicolour tones
- Brings back the rich, just-rained look on faded, weathered stone
- Superb on risers, walls and paving borders
- Enhancing finishes can be slicker underfoot — keep it off flat treads
- Sealing and colour will need refreshing over time
If you love the rich, just-rained look that makes Indian sandstone’s colours pop, this colour-intensifying sealer delivers it — deepening and enriching the stone’s natural tones rather than sitting on top as a flat coat. Our honest advice for steps: an enhancing, higher-sheen finish can be slicker underfoot, so use it on the vertical risers, the surrounding walling and any flat paving away from foot traffic, and stick to the natural-finish sealer above on the flat treads people actually step on. Used that way, you get the colour without the slip risk.
3. Pro-Kleen Ultimate Indian Sandstone Sealer (Matt) — best value

Pro-Kleen Ultimate Indian Sandstone Sealer (5L, Matt)
- Clear matt finish — keeps the natural look, safe on treads
- Protects against weathering, stains, oil and grease
- One 5L tin covers around 50m² — sensible for a whole patio plus steps
- Weather protection the maker rates at up to around 10 years
- Matt-only — won't enrich or deepen the colour
- Needs a properly dry, settled spell to apply
When you’ve a whole patio-and-steps job to cover and want to keep the outlay sensible, this is the pick. The clear matt finish leaves the stone looking natural and the treads grippy, while guarding against weathering, staining and the oil and grease that end up on any garden surface. Coverage is generous at roughly 50m² a tin and the stated protection runs to around a decade, so it does the essential work over a large area without a fuss.
4. Sika Path & Patio Sealer — best for damp, green-prone steps
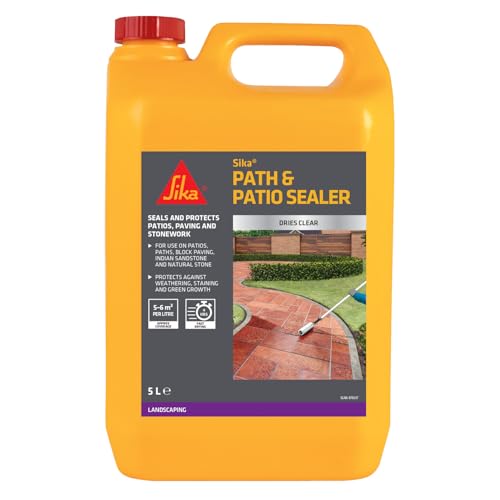
Sika Path & Patio Sealer (5L)
- From Sika — a long-established, trusted building-products brand
- Protects against weathering and green algae growth
- Well suited to damp, shaded, algae-prone steps
- Natural finish that keeps tread grip
- A sealer slows algae — it doesn't replace an occasional clean
- Shaded steps in constant damp may still need a periodic wash
Steps that sit in shade or stay damp are the ones that go green and slippery first, and this is the pick for them. Sika is a name that turns up across proper building sites, and this path-and-patio sealer is formulated to protect against weathering and the green algae growth that damp, shaded stone attracts. It won’t make cleaning a thing of the past, but on north-facing or tree-shadowed sandstone steps it slows the green film that makes treads treacherous through autumn and winter.
How to seal Indian sandstone steps
- Clean thoroughly. Remove all algae, moss, dirt and any existing efflorescence. A stiff brush and a dedicated patio cleaner is safer than a high-pressure washer, which can pit soft sandstone and force water deep into the stone. Our guide to cleaning stone steps and patios without damaging the stone walks through the safe method in full.
- Let it dry — properly. Indian sandstone holds water for a long time. Wait for 24–48 hours of dry weather after cleaning; sealing damp stone traps moisture and can cause the sealer to cloud or fail.
- Apply thin, even coats. Use a brush, roller or low-pressure sprayer and work in manageable sections. Thin and even beats thick and patchy every time.
- Wipe any pooling. Don’t let sealer sit in puddles on the surface — spread it out or wipe it off before it dries, or you’ll get shiny patches and streaks.
- Add a second coat on very porous stone. Reclaimed or riven Indian sandstone drinks sealer; a second thin coat once the first has soaked in gives fuller protection.
- Cure before use. Keep foot traffic off until fully cured (check the product — often 24 hours to touch-dry, longer to fully harden). Test the finished tread by splashing water: it should bead and roll off rather than soak in and darken.
For the full method of building and finishing a flight from scratch, see our guide to laying stone garden steps, and if you’re still choosing the stone itself, our roundup of the best stone for garden steps covers where Indian sandstone fits against York, granite and porcelain.
What causes efflorescence — and how to treat it
Efflorescence is the chalky white bloom that appears on Indian sandstone, especially on newly laid steps. It looks like the stone is “leaching” a pale powder, and it worries a lot of people into thinking they’ve bought a faulty batch. They almost certainly haven’t — efflorescence is a normal, natural process, and on new sandstone it’s practically expected.
Why it happens
Natural sandstone contains soluble mineral salts. When water moves through the stone — rain soaking in, or moisture wicking up from the bedding mortar and sub-base below — it dissolves those salts and carries them to the surface. As the surface water evaporates, the salts are left behind as a white or off-white crust. So efflorescence is really a water problem: no moving water, no salt migration, no bloom.
The usual culprits on steps are:
- New stone and fresh mortar. Both the sandstone and the cement in the bedding mix carry salts. This is why a brand-new flight often blooms in its first few months, then settles down.
- A wet, poorly drained sub-base. Steps that sit on ground holding water feed a constant supply of moisture up through the stone.
- Rising damp against a wall. Steps built tight against a house or retaining wall can draw moisture (and salts) sideways as well as up.
- Sealing too soon. Trapping moisture and salts under a sealer is the single most common way people make efflorescence worse rather than better.
How to treat it
The frustrating truth is that there is no instant fix — you’re waiting for the stone’s salt reservoir to exhaust itself, which can take a full season or two. What you can do:
- Brush it off dry. A stiff (not wire) brush lifts most fresh efflorescence when the stone is bone dry. Do this rather than washing it — water only re-dissolves the salts and draws more up.
- Let the flight dry out and re-bloom. Expect it to come back a few times as more salt works its way out. Keep brushing each time. This cycle is the salts depleting — it’s progress, even if it doesn’t feel like it.
- Use a proper efflorescence remover for stubborn deposits. A dedicated (usually mildly acidic) efflorescence remover dissolves hardened crust that won’t brush away. Follow the maker’s dilution to the letter, keep it off adjacent metal and planting, and rinse well. Never use ordinary brick acid at full strength on sandstone — it can burn and lighten the surface.
- Fix the water source if it persists. If a flight keeps blooming long past its first year, the problem is usually drainage or rising damp underneath, not the stone. Improving the sub-base drainage is the real cure.
- Only seal once the blooming has genuinely stopped. A breathable impregnating sealer then slows how much water moves through the stone, which keeps future efflorescence to a minimum. Never seal over active efflorescence — you’ll lock the salts and moisture inside and can end up with a permanent white haze under the sealer.
Applying sealer to riven Indian sandstone — the method
Most Indian sandstone paving is riven — split along its natural bedding plane so the face has that characteristic rippled, slightly uneven texture. Riven stone is lovely, but it changes how you seal: the surface is more open and thirsty than a sawn or honed face, the texture holds sealer in its dips, and the grip you get from that texture is worth protecting. Here’s how to seal riven Indian sandstone steps properly.
What’s different about riven stone
- It’s thirstier. The open, textured face and the exposed grain drink sealer faster than a smooth stone, so coverage per litre is lower and you’ll often want a second coat.
- Sealer pools in the dips. The rippled surface has low spots where liquid sealer collects, dries glossy and leaves shiny “wet” patches if you don’t spread it out.
- The texture is the grip. On a tread, that rippled face is doing safety work. Choose an impregnating or matt sealer that soaks in rather than a film-forming wet-look that can fill the texture and reduce grip.
Step by step
- Clean and let it dry hard. Riven stone holds water in its texture longer than smooth stone, so give it a genuinely dry spell — 48 hours of dry weather after cleaning is a safer minimum than 24 on riven faces.
- Work sealer into the texture, not just over it. A brush pushes sealer down into the ripples and split lines far better than a roller, which tends to skim the high points and leave the low spots bare. A low-pressure sprayer followed by brushing-in works well on a big flight.
- Go thin and keep it moving. Apply less than you think you need and spread it out. On riven stone the temptation is to flood it because it drinks so fast — resist that, because flooding is exactly what leaves gloss puddles in the dips.
- Chase the pooling immediately. Watch the low spots. Anywhere sealer gathers, brush it out or wipe it back before it starts to dry. This is the single most important step on riven stone.
- Second thin coat once the first has soaked in. Because riven sandstone is so porous, one coat rarely gives full protection. Wait for the first coat to be touch-dry and absorbed, then apply a second thin coat the same way, again chasing any pooling.
- Check the whole flight in raking light. Once cured, look across the treads with the light low (early morning or evening). Raking light shows up any glossy pooled patches you missed — a quick going-over with white spirit or the maker’s recommended cleaner will knock back small shiny spots on a solvent-based sealer.
The same “thin coats, chase the pooling, second coat on porous stone” discipline applies to riven York stone and reclaimed flags too — for the wider picture across sealer types and stones, see our main guide to the best stone sealers for steps and patios.
Do you need to seal Indian sandstone?
You don’t have to — but on steps it’s strongly worth it. Bare Indian sandstone absorbs water, and that water is what feeds the slippery green algae, drives frost damage in winter and carries salts to the surface as efflorescence. Sealing won’t make the stone bulletproof, but it dramatically slows all three, keeps steps safer underfoot and makes routine cleaning far easier. On a surface people walk on in the wet, that trade-off is an easy yes.
What is the best sealer for Indian sandstone?
For steps, the best all-round choice is a breathable impregnating sealer (our top pick above). It protects from within, keeps the stone’s natural matt look and — the part that matters most on a tread — doesn’t reduce grip. Only reach for a wet-look sealer if you specifically want to deepen the colour, and then keep it to risers, walls and non-walked paving rather than the treads themselves.
Does sealing stop efflorescence?
It helps, but it isn’t a magic cure. Efflorescence happens when water moving through the stone carries dissolved salts to the surface, where they dry as a white bloom. A good breathable, salt-resistant impregnating sealer reduces how much water moves through the stone and therefore how often efflorescence appears. The critical rule: never seal over active efflorescence — you’ll trap the salts and moisture inside. Brush off the existing bloom (dry, or with a proper efflorescence remover), let the stone dry out fully, then seal.
How often should you re-seal?
On steps, most impregnating sealers last around 3–5 years; wet-look and budget water-based sealers less, often 2–3 years. Indian sandstone’s porosity and the constant foot traffic on treads both shorten the interval, so lean toward the lower end. The simple test: splash water on the tread — if it soaks in and darkens the stone rather than beading up, it’s time to re-seal. For the wider view of sealer types across all stone, see our main guide to the best stone sealers for steps.
FAQ
How long should you wait before sealing newly laid Indian sandstone?
Give a new flight time to dry out and — ideally — to get its worst efflorescence out of the way first. As a rule of thumb, wait at least four to six weeks after laying so the bedding mortar has cured and dried, and longer if the stone is still actively blooming white salts. Sealing over damp, freshly laid stone is the classic mistake: it traps moisture and salts underneath and can leave a permanent haze.
Can you seal Indian sandstone that’s already efflorescing?
No — this is the one hard rule. Sealing over active efflorescence locks the salts and moisture inside the stone, and they can then bloom underneath the sealer where you can’t brush them away. Brush the bloom off dry, treat stubborn deposits with a proper efflorescence remover, let the stone dry out fully, and only seal once it has genuinely stopped re-blooming.
Will sealing Indian sandstone make my steps slippery?
It depends entirely on the finish. An impregnating (penetrating) sealer soaks in, leaves a matt natural finish and doesn’t change the grip — that’s the safe choice for treads. A film-forming wet-look sealer can make a wet tread more slippery, so keep glossy finishes off the flat surfaces people walk on and use them only on risers, walls and borders. If grip is your main concern, our guide to the best non-slip stone step treads has more options.
How much sealer do I need for a flight of steps?
Coverage varies with how porous and textured the stone is, but a rough working figure for impregnating sealers on smooth-ish sandstone is around 8–12 m² per litre per coat. Riven and reclaimed sandstone is thirstier, so expect the lower end and budget for a second coat — realistically you might only get 6–8 m² per litre on very open stone. Always buy a little extra rather than run out mid-flight and leave a dry, unsealed patch.
Should you seal the risers as well as the treads?
You can, and it’s worth doing for a consistent look and full protection — but you’re free to use a different finish on each. Because nobody stands on the vertical risers, they’re the right place for a colour-enhancing or wet-look sealer if you want richer tones, while the flat treads keep the safer matt impregnating finish. Sealing both also helps stop water tracking in at the joints between them.
Does sealing change the colour of Indian sandstone?
A plain impregnating or natural-finish sealer is designed not to change the colour — it keeps the stone looking as it does dry. A colour-enhancing or wet-look sealer deliberately deepens and enriches the tones to that rich, just-rained look, which is lovely on faded or weathered stone. If you want the colour to stay exactly as-is, choose a natural finish; if you want the tones to pop, choose an enhancer — and on steps, keep the enhancer to the risers and surrounds.