How to Lay Stone Garden Steps: A Step-by-Step Guide
A practical walkthrough for laying a flight of natural stone garden steps — the tools, materials and method for a solid, level result.
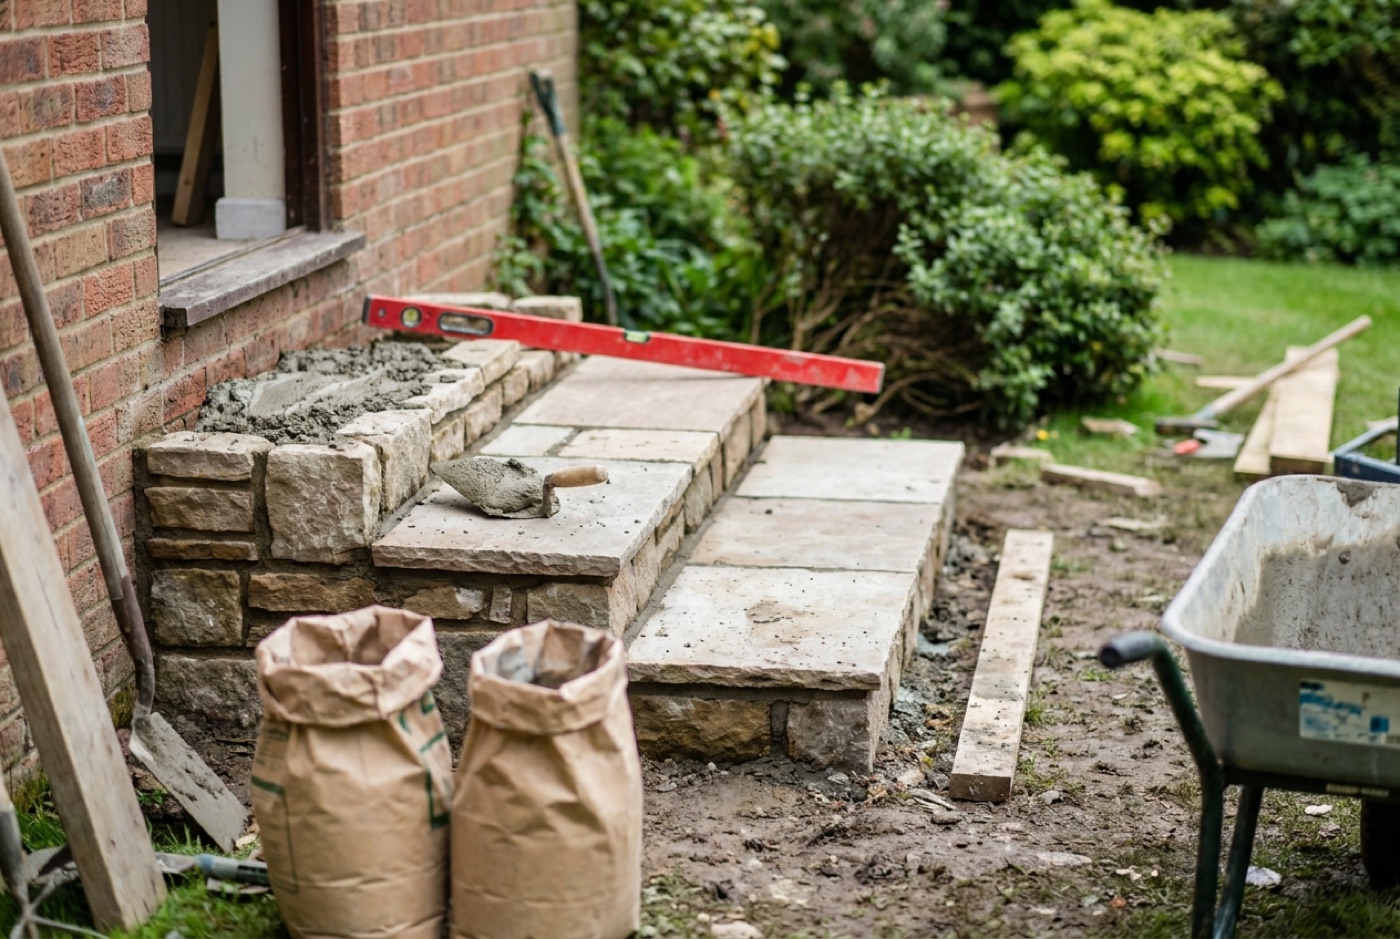
Learning how to lay stone garden steps is well within reach for a confident DIYer — the key is getting the groundwork and the “rise and going” right before a single slab goes down. Rush the foundations or set out inconsistent steps and no amount of neat pointing will save the flight; get them right and a well-built stone staircase will outlast the house. This guide walks through the full method we’d follow, from the tools and materials you’ll need, through foundations and drainage, setting out the rise and going, the build sequence itself, and the common mistakes that catch people out. If you’re still deciding what to build in, start with our guide to the best stone for garden steps.
What you’ll need
- Sharp sand and cement (for a 4:1 mortar bed), plus a bag of postcrete for the base
- Natural stone step treads and, if building up, walling stone or blocks for the risers
- A spirit level, rubber mallet, bolster chisel and a stiff brush
- A cement mixer or mixing board
- Jointing compound or a dry brush-in mortar to finish
For cutting stone cleanly you’ll want an angle grinder with a diamond blade — see our companion guide to the best stone sealers for protecting the finished flight.
Tools & materials checklist
Before you break ground, gather everything so you’re not chasing off to the merchant with half a riser bedded and the mortar going off. Here’s the full kit for a typical short flight.
Groundwork & mixing
- MOT type-1 hardcore for the sub-base (order by the tonne bag)
- Sharp sand and cement for the mortar bed (a 4:1 or 5:1 mix)
- Postcrete or a batch of C20 concrete for the footing
- Cement mixer or a large mixing board and shovel
- Wheelbarrow, buckets and a watering can
- Whacker plate (compactor) — hire one for the day if you don’t own one
Setting out & levelling
- Tape measure, pencil and a builder’s square
- Long spirit level (1.2m is ideal) plus a small torpedo level
- String line, timber pegs and a club hammer
- A straightedge or scaffold board for checking runs
- Line-level or laser level for longer flights
Laying & finishing
- Rubber mallet and a pointing trowel
- Bolster chisel and lump hammer for trimming
- Angle grinder with a diamond blade for clean cuts
- Stiff brush and sponge for cleaning off
- Jointing compound or a dry brush-in mortar
- Knee pads, gloves, goggles and a dust mask
The stone itself
- Natural stone step treads (typically 40–50mm thick for garden steps)
- Walling stone, blocks or bricks for the risers
- A stone sealer for once the flight has cured and dried out
Buy roughly 10% more stone than your measurements suggest. Off-cuts, breakages and the odd rejected slab with a poor face are normal, and having spares to hand beats a second delivery charge. If you’re weighing up materials, our best stone for garden steps guide compares York stone, sandstone, granite and more on looks, grip and durability.
Foundations & drainage
Everything above ground is only as good as what’s beneath it. Steps that sink at one corner, rock underfoot or lift after a hard winter almost always trace back to a weak base or trapped water — not the stonework.
Getting the sub-base right
Excavate down to firm, undisturbed ground and remove any soft topsoil, roots or made-up ground. For a garden flight, lay at least 100–150mm of MOT type-1 hardcore, spread in layers and compacted with a whacker plate until it stops moving under the plate. On soft or clay soils, or under a wide flight, dig deeper and lay a reinforced concrete footing (150mm of C20 with a light mesh) for the bottom riser to sit on. The bottom step carries the most load and takes the most abuse, so never skimp here.
Why drainage makes or breaks a flight
Water is the enemy of any outdoor stonework. Trapped water freezes, expands and prises joints apart, and standing water breeds the algae that makes steps treacherous. Build drainage in from the start:
- Lay every tread with a slight forward fall of 2–3mm across its depth so rain sheds off the front edge rather than pooling at the back.
- Never leave a “birdbath” dip in the middle of a tread — check with a straightedge.
- On a cut-in flight against a bank, run a slot drain or a permeable gravel margin behind the top step so water can’t sit against the stone.
- Bed treads on a full mortar bed, not five dabs — a spot-bedded slab traps water in the voids underneath, which then freezes and lifts the stone.
Steps that drain freely stay cleaner, safer and structurally sound for decades. For keeping the finished flight clear, see our guide to removing moss and algae from steps.
Setting out the rise and going
“Setting out” means working out your step geometry on paper before you dig — it’s the single most important stage, and the one most rushed. The two numbers that matter are the rise (the height of each step) and the going (the horizontal depth you tread on).
Do the maths first
- Measure the total rise — the vertical height from the bottom finished level to the top finished level. Use a level run off pegs and a string line, not a tape held up a slope.
- Divide the total rise by your target step height to get the number of steps. Aim for a rise of 100–150mm and round to a whole number of equal steps.
- Recalculate the exact rise: total rise ÷ number of steps. Every step must be identical — a single odd step is the classic trip hazard.
- Set the going to at least 300mm so an adult foot lands comfortably. Shallower goings feel steep and unsafe.
There’s a rule of thumb worth knowing: twice the rise plus the going should land between roughly 550mm and 700mm (2R + G). It keeps the relationship between step height and depth comfortable to walk. For the full picture — including how rise and going interact, comfortable ranges and worked examples — read our dedicated garden step dimensions: rise and going guide.
Mark it out on the ground
Transfer your figures to the ground with pegs and string before you cut a sod. Peg the top and bottom of the flight, run a level string line, and mark the front (nose) of each tread along it. Seeing the flight laid out full-size often reveals a step too many or too few — far cheaper to fix now than once the concrete’s in.
Step 1 — Work out your rise and going
Measure the total height you need to climb (the “total rise”) and divide it into equal steps. For comfortable garden steps aim for a rise of 100–150mm per step and a going (depth) of at least 300mm. Keep every step identical — uneven steps are the number-one trip hazard.
Step 2 — Dig and compact the base
Excavate the staircase profile, allowing for your foundation depth plus the tread thickness. Compact the sub-base with an MOT type-1 hardcore and a whacker plate. A solid, well-drained base is what stops steps sinking or heaving over winters.
Step 3 — Build the first riser
Lay a concrete footing for the bottom step, then build your first riser off it using walling stone or blocks bedded in mortar. Check it’s level in both directions before it goes off.
Step 4 — Bed the tread
Butter a full mortar bed onto the riser and sub-base — never spot-bed a step, as the unsupported middle will crack underfoot. Lay the tread with a slight forward fall (2–3mm) so rain runs off rather than pooling. Tap level with the rubber mallet.
Step 5 — Repeat up the flight
Each tread’s back edge forms the base for the next riser. Work up the flight one step at a time, constantly checking rise, going and level. Let the mortar cure before heavy use.
Step 6 — Point and seal
Once cured, fill the joints with a jointing compound and brush off the excess. Finally, seal the stone to lock out water and slow algae — the single best thing you can do for long-term looks and grip. Our sealer buying guide covers the options.
Building regs & safety
Most domestic garden steps don’t require Building Regulations approval — a freestanding flight of steps in the garden, away from the house, is generally outside the scope. But the picture changes the moment the steps form part of an access route to or from a building, sit inside a change-of-level greater than 600mm, or are part of a raised patio or decking above that height, where guarding (a handrail or balustrade) and stricter geometry can come into play.
The safe approach: keep every step equal, keep the rise and going within comfortable limits, and fit a handrail on any flight of three or more steps or on anything a child or older person will use regularly. If your project touches the house, sits high above the surrounding ground, or you’re unsure, check the rules before you build. Our garden steps building regulations guide sets out when regs and planning apply and the safety standards worth following even when they don’t.
Common mistakes to avoid
A handful of errors account for most failed flights. Steer clear of these and you’re most of the way to a staircase that stays solid and safe.
- Spot-bedding treads — always use a full mortar bed. Five dabs leave voids that crack under load and trap water that freezes and lifts the slab.
- No fall on the tread — water pools, then freezes, then cracks. Build in a 2–3mm forward fall on every step.
- Skimping on the base — everything above it is only as stable as the ground below. Compact the sub-base properly and lay a footing under the bottom riser.
- Unequal steps — the most dangerous and most common mistake. A single step 10–15mm out of line catches people out and is the leading cause of falls on stairs. Set out on paper first and check every rise with a level.
- A going that’s too shallow — under 300mm and an adult foot overhangs the nose, which feels steep and unsafe underfoot.
- Building on wet, soft or frosty ground — never bed stone on frozen ground or in a hole full of water, and don’t lay mortar below about 3°C.
- Sealing too soon — sealing damp or freshly laid stone traps moisture inside. Let the flight cure and dry out fully first, then apply your stone sealer.
- Weak or missing pointing — open joints let water track under the treads. Point fully and neatly once the beds have cured.
Even a well-built flight will need occasional attention over the years. When a step does eventually crack, chip or drop, our guide to repairing stone steps walks through fixing it without ripping out the whole staircase.
FAQ
How deep should the foundations be for garden steps?
For a typical garden flight, allow at least 100–150mm of compacted MOT type-1 hardcore beneath the treads, plus a concrete footing (around 150mm of C20) under the bottom riser, which carries the most load. On soft, clay or made-up ground, dig deeper until you reach firm undisturbed ground. Good foundations are what stop steps sinking or heaving over the winters.
What is the ideal rise and going for garden steps?
Aim for a rise (height) of 100–150mm per step and a going (depth) of at least 300mm. A useful check is the “2R + G” rule — twice the rise plus the going should fall between roughly 550mm and 700mm for a comfortable walk. Above all, every step in the flight must be identical. See our rise and going guide for the full detail.
Do I need Building Regs or planning permission for garden steps?
Most standalone garden steps don’t need Building Regulations approval or planning permission. Approval is more likely where steps form access to a building, sit within a change of level over 600mm, or are part of a raised patio or decking that requires guarding. If your steps touch the house or are notably high, check first — our building regulations guide explains where the lines fall.
Can I lay stone steps on a slope or over an existing bank?
Yes — cutting a flight into a slope is one of the most common garden-steps jobs. Dig out the staircase profile in “steps” of firm ground, compact each level, and build from the bottom up so every tread’s back edge forms the base for the next riser. Manage drainage carefully behind the flight so water can’t sit against the stone or wash out the ground beneath it.
What mortar mix should I use for laying stone steps?
A 4:1 or 5:1 sharp-sand-to-cement bedding mortar suits most natural stone treads and risers. Mix it to a firm, workable consistency — not sloppy — so the tread doesn’t sink or squeeze out as you tap it level. Use a full bed under every tread rather than spot dabs, and point the joints once the beds have cured.
How long before I can use the steps after laying them?
Let the mortar cure before any heavy use — generally at least 24–48 hours before light foot traffic and around a week before regular use, longer in cold weather. Then let the stone dry out fully before you seal it. Rushing either stage risks cracked beds and moisture trapped under the sealer.
Should I seal natural stone garden steps?
Yes. Sealing locks out water, slows the algae and moss that make steps slippery, and keeps the colour looking good — it’s the single best thing you can do for long-term looks and grip. Wait until the flight is fully cured and dry, then apply a breathable sealer suited to your stone. Our sealer buying guide covers the options.