Front Porch Steps: Ideas, Materials & Safety
Front porch steps ideas for UK homes — materials, proportions, non-slip finishes, handrails, lighting and drainage that keeps water away from the house.
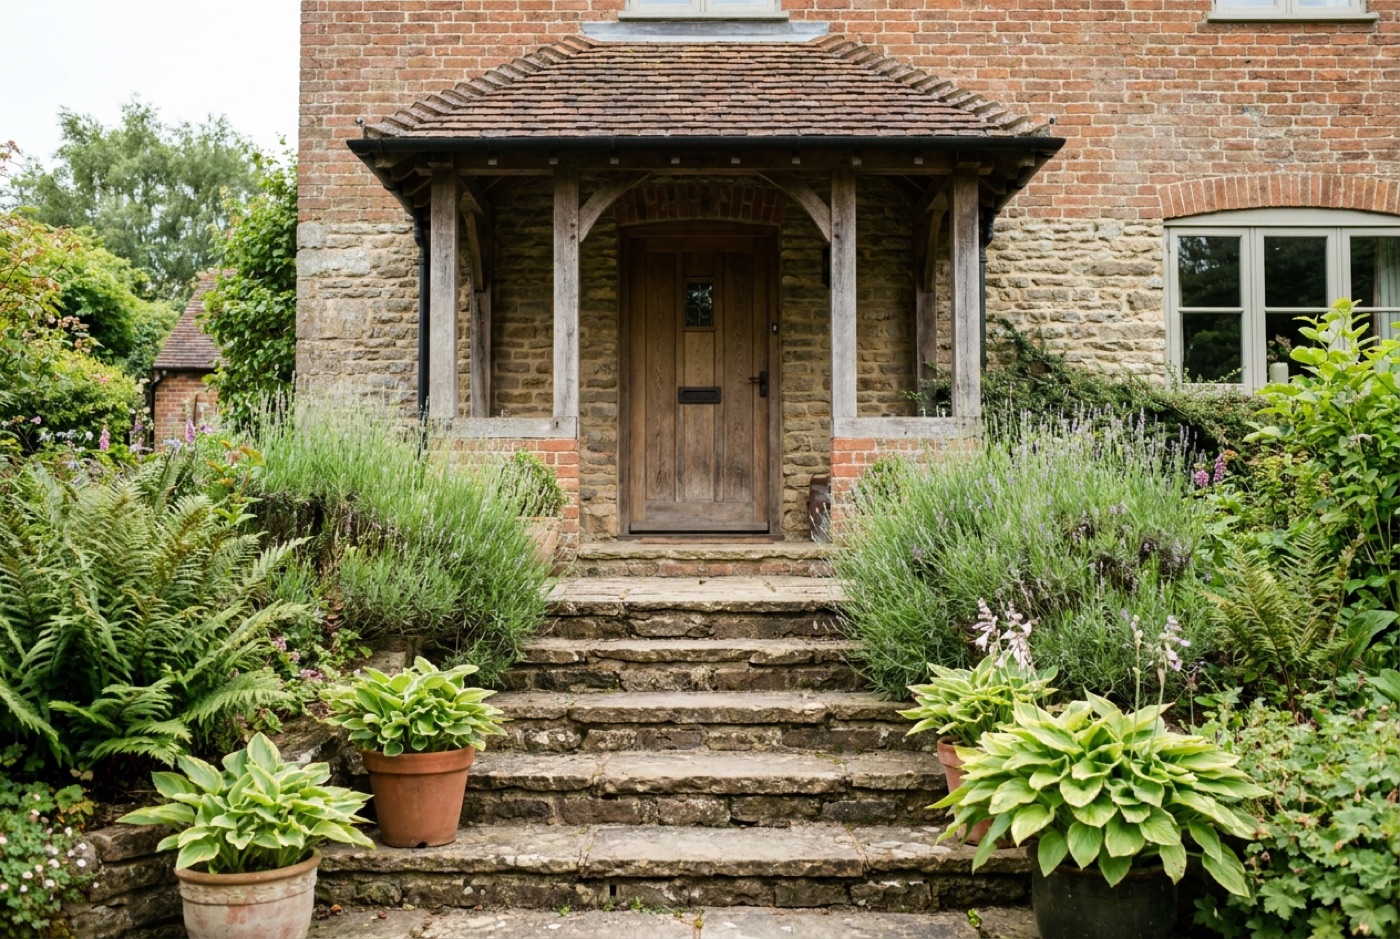
Your front porch steps are the first thing a visitor touches and the last thing you climb every night — so they have to look the part and stay safe in every kind of British weather. Good front porch steps do three jobs at once: they welcome people in, they bridge the level change between path and threshold, and they shed rain away from the house rather than towards it. Get the material, proportions and grip right and you have an entrance that ages gracefully for decades. Get them wrong and you’re left with a slippery, wobbly, water-trapping hazard right outside your door. Below we run through the best materials, the proportions that feel right underfoot, how to keep them grippy and dry, and the lighting and handrail details that turn a plain flight into a proper porch.
Front porch steps: where to start
Before you fall in love with a look, front porch steps have to satisfy a few fixed constraints. They sit in the wettest, most-used spot on the whole property, they usually meet a damp-proof course you must not bridge, and they carry everyone from toddlers to elderly relatives to a delivery driver with an armful of parcels.
So the running order is always the same: structure and drainage first, then proportions, then material, then the finishing touches (grip, handrail, lighting). Choose the pretty stone before you’ve worked out where the water goes and you’ll regret it the first wet November.
A few questions worth answering up front:
- How many steps do you actually need? (Total rise from path to threshold ÷ a comfortable riser height.)
- Is there room for the treads to be deep enough without eating the path?
- Where is the damp-proof course, and can you keep the finished steps at least two brick courses (150mm) below it?
- Which way does the ground fall — towards the house, or away from it?
If you’re building rather than just re-facing, our companion guide to front door steps ideas covers the design side in more depth, and it’s worth checking whether your project needs building regulations sign-off before you start.
The best materials for front porch steps
The material sets the whole tone of your entrance, so match it to the house first and the trend second. Here’s how the common UK options stack up.
| Material | Look | Grip when wet | Upkeep | Best for |
|---|---|---|---|---|
| Riven sandstone (Indian / York) | Warm, traditional | Good (naturally textured) | Seal every 2–3 yrs | Period & cottage homes |
| Portland / limestone | Pale, formal, classical | Fair — seal it | Stains, needs sealing | Grand, low-traffic entrances |
| Granite (flamed) | Modern, hard-wearing | Excellent | Very low | Busy, exposed porches |
| Slate | Dark, contemporary | Good (riven face) | Low, seal for colour | Modern homes |
| Porcelain (textured) | Sleek, contemporary | Excellent (R11) | Almost none | New-build & modern porches |
| Brick | Traditional, homely | Fair | Repoint occasionally | Victorian/Edwardian houses |
| Concrete (cast/units) | Neutral, budget | Depends on finish | Low | Budget & utility entrances |
Natural stone
Natural stone is the classic front porch material for good reason — it looks established from day one and gets better as it weathers. Riven sandstone (Indian or York) gives a warm, grippy, traditional face that suits most British homes. Portland limestone cuts to crisp, formal lines behind countless period facades but is soft and stains, so it wants sealing and a sheltered spot. Granite is the workhorse — flamed granite grips brilliantly and shrugs off frost, ideal for an exposed, busy entrance. Slate brings a moody, modern depth. For a full breakdown of how the traditional stones compare, see our York vs Portland vs granite comparison.
Porcelain
If your house is modern or newly rendered, textured porcelain treads look sleek, barely absorb water (so algae struggles to take hold) and come in convincing stone-effect finishes. Choose an R11-rated anti-slip texture for external steps. The trade-off is fitting: porcelain needs a full mortar bed, a primer slurry and a proper wet-cutter, so it’s less forgiving than sandstone for a first-timer.
Brick
Brick steps tie a porch back to a Victorian or Edwardian house better than almost anything, especially when you match the brick and bond to the original walls. Use frost-resistant engineering or paving bricks for the treads — not soft facing bricks, which spall and crumble once water gets into them and freezes.
Concrete
Cast concrete or pre-made concrete step units are the budget-friendly, beginner option and needn’t look municipal. An exposed-aggregate or board-marked finish gives texture and grip, and you can always face the visible riser with a brick or stone slip to lift the look.
Getting the proportions right
Nothing marks out a well-built porch like steps that feel effortless underfoot — and that comes down to rise (the height of each step) and going (the depth of the tread). Consistency matters more than any single number: a flight where one step is even 10mm out is exactly where people trip.
Sensible UK guidance for domestic front porch steps:
- Rise: aim for around 150–170mm per step; keep every riser identical.
- Going (tread depth): at least 250mm, and 280–300mm+ feels far more gracious on an entrance flight.
- Width: make the steps at least as wide as the door, and ideally wider — a generous, welcoming width feels far better than a mean one.
- Two low, wide steps almost always look more inviting than one tall, awkward one.
A gentle “twice rise plus going” rule of thumb keeps things comfortable: **(2 × rise)
- going** should land somewhere around 550–700mm. So a 160mm rise with a 300mm going gives 620mm — a relaxed, easy stride.
Also build in a slight fall on each tread — around 1 in 60 (roughly 15mm over a 900mm tread) sloping away from the house — so rainwater runs off the front edge instead of pooling against the threshold. More on that below.
Keeping front porch steps non-slip
Your porch is the wettest, most-used flight on the property, so grip isn’t optional. The single most common cause of a slippery front step is algae glazing over a smooth, sealed-shut stone — so the fix starts with the finish, not a coating bolted on later.
- Choose a textured finish from the start: riven, flamed or bush-hammered stone, or an R11+ porcelain. Avoid smooth, polished or honed surfaces on an external flight.
- Add a defined grippy edge: a bullnosed front tread, or an anti-slip nosing along the step edge, gives a clear line where feet land. Our guide to the best non-slip stone step treads walks through nosings, inserts and stone-effect treads that hold their bite in the wet.
- Seal porous stone (but don’t glaze it): a breathable impregnating sealer keeps sandstone and limestone from soaking up water and greening over, without leaving a slick film. Avoid high-gloss “wet-look” sealers on steps — the shine can reduce grip.
- Keep them clean: most “slippery steps” are really just dirty steps. A yearly wash and a gentle algae treatment restores grip fast — see our cleaning guide for a method that won’t damage the stone.
For an external UK entrance, look for a slip rating of R11 or above (or a pendulum “PTV 36+”). Anything less can turn treacherous once a season’s worth of algae builds up on the surface.
Handrails and safety
A front porch flight is where safety matters most — it’s used in the dark, in the wet, and by everyone from small children to elderly visitors. A handrail is the single cheapest safety upgrade you can make.
- When to fit one: as a rule of thumb, any flight of three or more risers, or any porch used by older or less-steady visitors, benefits from a handrail. Building regulations may require one on a defined “flight” — worth checking in our garden steps building regs guide.
- Height: set the grippable rail at roughly 900–1000mm above the pitch line of the steps.
- Fix it into something solid: anchor posts into concrete, sound masonry or a proper stone tread — never just into soft mortar or render.
- Material: powder-coated steel, galvanised iron and stainless all weather well outdoors. Match the style to the house — a slim contemporary rail for a modern porch, a wrought-iron look for a period one.
- Both sides if it’s wide or steep: on a broad or tall flight, a rail each side is more welcoming and much safer.
Other safety details worth building in: bullnosed (rounded) front edges are kinder to shins and less prone to chipping; a contrasting nosing strip helps people judge the edge in low light; and keeping every rise and going identical does more for safety than any single gadget.
Lighting your porch steps
Lighting turns a flight from a night-time hazard into the highlight of your entrance — and it’s genuinely the difference between spotting the edge of a wet step and missing it in the dark.
- Recessed riser lights: low-level lights set into the face of each riser wash the tread below with a soft glow. They look beautiful and are the safest option — but plan the cabling and recesses before you lay the steps, because retrofitting into finished stone is a real headache.
- Wall or post lanterns: a pair of downward-throwing lights either side of the door lights the whole flight and suits traditional porches.
- Inset tread or edge lights: small warm-white LEDs inset into the tread edge pick out each step cleanly.
- Solar or battery lights: where mains cabling isn’t practical (a rental, or a budget job), solar step lights give the lit-step effect with no wiring — just accept that short, grey UK winter days charge them weakly.
Whatever you choose, pick a warm-white colour temperature (around 2700–3000K). Cheap cold-blue LEDs make a welcoming porch look like a car park, and warm light is far kinder on a home’s frontage. Use only outdoor-rated fittings — IP65 or better — and a proper low-voltage transformer; indoor tape won’t survive a British winter.
Drainage: keeping water away from the house
This is the detail that separates a porch that lasts from one that rots the front of your house — and it’s the bit most DIY builds get wrong. Water must always run away from the threshold, never towards it, and it must never bridge your damp-proof course.
Get these right:
- Slope every tread away from the house. A fall of around 1 in 60 (roughly 15mm over a 900mm tread) sheds rain off the front edge instead of pooling against the door.
- Stay below the damp-proof course. Keep the finished top step at least 150mm (two brick courses) below the DPC. If steps or fill sit above it, they bridge the DPC and let damp track straight into the wall.
- Don’t seal the steps to the wall. Leave a small gap or a compressible joint where the steps meet the house, so water isn’t funnelled into the junction and the two can move independently.
- Provide somewhere for water to go. A permeable base, a channel drain across the foot of the flight, or a French drain alongside stops water sitting on the treads or soaking the foundations. This matters even more on new porcelain and concrete steps, which shed water fast and can create a puddle at the bottom.
- Point up the joints properly. Well-filled, slightly weathered mortar joints stop water sitting in gaps and freezing — the classic cause of lifted, cracked front steps.
If your existing steps already trap water or sit too high against the wall, that’s a job worth fixing before it damages the house — not after.
Style ideas by house type
A few combinations that reliably work in the UK:
- Victorian / Edwardian terrace: frost-resistant brick risers with a bullnosed stone or tiled tread, a black wrought-iron handrail and a wall lantern each side.
- 1930s semi: riven Indian sandstone steps in a buff-grey blend, a slim galvanised rail and inset warm-white tread lights.
- Period / grand entrance: dressed Portland limestone with crisp lines, a stone balustrade or elegant metal rail, and symmetrical post lanterns.
- Modern / new-build: large-format textured porcelain treads matched to the front path, a minimal stainless rail and recessed riser lighting.
- Cottage: reclaimed York stone with a soft weathered edge, planting pockets either side and a single wall light — relaxed and established.
FAQ
What is the best material for front porch steps in the UK?
For most British homes, riven natural sandstone (Indian or York) hits the sweet spot — it’s naturally grippy, weathers beautifully and suits period and modern houses alike. If your porch is very exposed or busy, flamed granite or textured porcelain are the most hard-wearing and slip-resistant. Match the material to your house first, then prioritise a textured, non-slip finish.
How deep should a front porch step be?
Aim for a going (tread depth) of at least 250mm, and 280–300mm or more for a gracious entrance flight. Keep the rise around 150–170mm and, above all, make every step identical — inconsistent risers are the single biggest trip hazard. Wide, low steps almost always feel more welcoming than tall, shallow ones.
Do I need a handrail on my porch steps?
As a general rule, any flight of three or more risers, or any porch regularly used by older or less-steady people, benefits from a handrail — and building regulations may require one. Fit it at around 900–1000mm above the steps and anchor it into concrete or sound masonry, never soft render. On a wide or steep flight, a rail on each side is safer and more inviting. Check our building regulations guide for the current rules.
How do I stop my front steps being slippery?
Start with a textured surface — riven, flamed or R11-rated porcelain — rather than a smooth, polished one. Add a bullnosed edge or an anti-slip nosing where feet land, seal porous stone with a breathable (non-gloss) sealer, and clean off algae once a year. Most “slippery” steps are simply dirty; a wash and an algae treatment usually restores the grip.
How do I keep water away from my front door steps?
Slope each tread very slightly away from the house (about 1 in 60) so rain runs off the front edge, keep the finished steps at least 150mm below the damp-proof course so they don’t bridge it, and give surface water somewhere to go — a permeable base, a channel drain or a French drain at the foot of the flight. Never seal the steps hard against the wall, as that funnels water into the junction.
Can I build front porch steps myself?
Simple concrete-unit or pre-cast steps are within reach of a confident DIYer, and re-facing existing sound steps with new treads is very doable. Where it gets tricky is laying porcelain (full mortar bed and wet-cutting), getting drainage and DPC clearances right, and anything structural. If in doubt on those points — or on whether you need building regs — it’s worth getting a landscaper or builder to price the job.
Ready to design your entrance?
Once you’ve settled on a material and a look, two guides take it further: our roundup of front door steps ideas for more design inspiration, and the best non-slip stone step treads so your finished porch stays safe through every wet British winter.