Brick Garden Steps: Ideas & How to Build Them
How to build brick steps for the garden — outdoor brick types, bonds, treads, foundations, rise & going and pointing, plus design ideas.
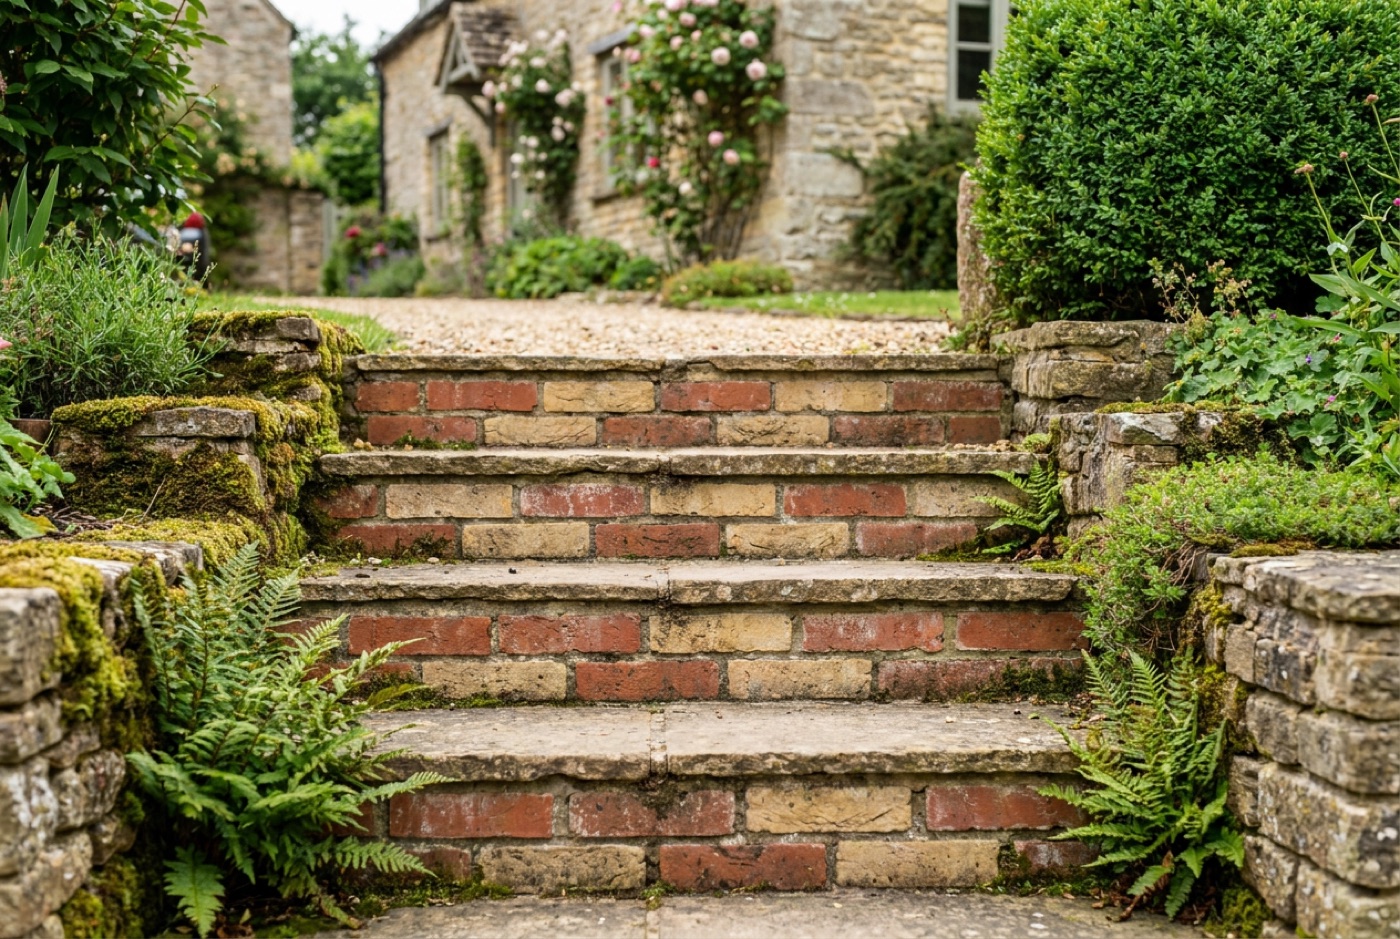
Brick garden steps are one of the most sympathetic ways to move between levels in a British garden — warm, characterful, and a natural match for brick houses, walls and paths. Learning how to build brick steps is well within reach for a confident DIYer, but the details matter: use the wrong brick and a British winter will flake it apart within a few seasons, and skimp on the foundation and the whole flight will sink or heave. This guide covers the ideas first — brick types that actually survive outdoors, bond patterns, and how to combine brick risers with stone or brick treads — then walks through the build itself: foundations, working out the rise and going, laying the courses, and pointing it all up neatly.
Why choose brick for garden steps?
Brick suits gardens in a way few materials do. It’s small-unit, so it works on tight curves and awkward level changes that would need cutting in a large slab. It ties a garden visually to a brick house, a brick boundary wall or a brick path, giving the whole plot a considered, joined-up look. And a well-laid brick step ages gracefully — the colour mellows, moss softens the edges, and it reads as part of the garden’s fabric rather than something bolted on.
The trade-off is labour. A flight of brick steps is a lot of small units, a lot of joints and a lot of pointing, so it’s slower to build than dropping in stone step units. It’s also less forgiving of a poor foundation, because every joint is a potential weak point if the ground moves. Done properly, though, brick steps last for generations.
If you’re weighing brick against natural stone or precast, our guide to the best stone for garden steps puts the options side by side on grip, durability and cost.
The most important decision: choosing the right brick
This is where most DIY brick steps go wrong. Ordinary facing bricks from a builder’s merchant — the kind used for the face of a house wall well above ground — are often not frost-resistant enough for a horizontal, ground-level, water-soaked application like steps. Steps sit in standing water, that water freezes, and a brick that soaks it up will spall (flake and crumble at the face) within a few winters.
Frost resistance and durability designation
UK bricks are classified for two things that matter outdoors:
- Frost resistance (F2, F1, F0). For garden steps you want F2 — frost-resistant, suitable for saturated, exposed conditions. F1 is “moderately frost-resistant” (fine for a wall face, risky flat on the ground); F0 is not frost-resistant and has no place in steps.
- Soluble salt content (S2, S1). S2 (low salt) reduces the risk of efflorescence — the white bloom that leaches out of bricks — and of salt crystallisation damage. It’s the safe choice for anything at ground level.
Buy F2 S2 bricks and you’ve removed the single biggest cause of failed brick steps. If in doubt, ask the merchant for the brick’s durability designation, or specify a brick sold explicitly for paving or landscaping.
Brick types suitable for outdoor steps
| Brick type | Suitable for steps? | Notes |
|---|---|---|
| Engineering brick (Class A / B) | Excellent | Very dense, low water absorption, high frost resistance — the toughest option, especially for treads |
| Frost-resistant facing brick (F2 S2) | Good | Use for risers and treads if rated F2 S2; check the designation |
| Clay pavers / paving bricks | Excellent (treads) | Made specifically to be walked on and laid flat; ideal tread material |
| Reclaimed stock brick | Sometimes | Full of character but variable — many old bricks are soft and not frost-resistant; use only known-hard stock |
| Ordinary facing brick (F1/F0) | Avoid | Will spall and crumble in a few winters at ground level |
| Concrete common / breeze block | Hidden work only | Fine buried as a core to build up to level, never as a visible tread |
Engineering bricks — dense, hard-fired, with very low water absorption — are the gold standard for the parts that take water and traffic. Many people build the risers in a matching facing brick for looks and reserve engineering bricks or clay pavers for the treads, which take the wear and the puddles.
Brick bonds and design ideas
The “bond” is the pattern the bricks are laid in, and it drives the whole look of the flight. You’ve got real freedom here.
Riser bonds
- Stretcher bond — bricks laid long-face-out, joints staggered. The simplest, cleanest look; the default for a single-brick-thick riser.
- Header bond — bricks laid end-out, showing the short face. More joints, a finer, more traditional texture; a lovely detail on a formal flight.
- Soldier course — bricks stood on end, vertical. A crisp, upright riser face that reads as deliberate and smart, and is popular where the riser is a single course tall.
Tread laying patterns
Treads are laid flat and are where you can have fun:
- Basketweave — pairs of bricks alternating horizontal and vertical. Classic, informal, very “English garden”.
- Herringbone — bricks at 45° or 90°, interlocking. Strong, handsome, and extremely stable underfoot because the units lock together.
- Running bond — simple staggered rows, quiet and orderly.
- Stack bond — grid-aligned, contemporary and minimal (though slightly weaker, so best on a fully mortar-bedded tread).
Mixing brick with stone
Some of the best-looking garden steps aren’t all brick. A very common — and very robust — approach is brick risers with a stone tread: brick gives you the warm vertical face, and a single slab of York stone, sandstone or a bullnosed coping caps each step. The stone tread sheds water cleanly, gives a comfortable walking surface with no joints to trip on, and creates a smart contrast. If you like that look, the method in our how to lay stone garden steps guide covers bedding stone treads, and it pairs directly with the brick riser method below.
For more layout inspiration across materials, our garden steps ideas round-up is full of flights worth stealing.
Getting the rise and going right
Before a single brick goes down, work out the geometry — this is what makes steps feel safe and natural rather than awkward and tiring.
- Rise is the height you step up each time. For comfortable garden steps, aim for 100–150mm per step. Brick makes this easy: a single brick course (roughly 75mm brick + 10mm joint ≈ 85mm) or two courses (≈ 170mm, trim with your bed joint) gives you a tidy rise that lands in range.
- Going is the depth of each tread front-to-back. Aim for a minimum of 300mm, and 350–450mm feels genuinely relaxed in a garden.
- Keep every step identical. Uneven steps are the number-one trip hazard — the human foot expects each one to be the same.
A widely used rule of thumb is that twice the rise plus the going should equal about 550–700mm (i.e. 2R + G ≈ 550–700). It keeps the relationship between step height and depth comfortable. For the full breakdown of comfortable dimensions, see our dedicated guide to garden step rise and going.
Work out your total rise (the vertical height between your two levels), divide by your chosen rise per step to get the number of steps, then set out the going so the flight fits the run available. Adjust the number of courses per riser and the tread going until the sums land in the comfortable ranges above.
How to build brick steps: step by step
This is an overview of the method for a straightforward garden flight. It assumes basic bricklaying confidence; a taller or retaining flight is a job for a professional.
What you’ll need
- F2 S2 frost-resistant bricks (facing for risers, engineering bricks or clay pavers for treads)
- Concrete for the foundation (a general C20 mix, or ready-mixed bags)
- Building sand and cement for a 3:1 or 4:1 bricklaying mortar
- Sub-base material — MOT Type 1 hardcore
- A cement mixer or mixing board, brick trowel and pointing trowel
- Spirit level, tape measure, string line and pins, rubber mallet
- Bolster chisel and club hammer (or an angle grinder with a diamond blade) for cutting bricks
- A stiff brush and a jointing iron for the pointing
Step 1 — Set out and dig the foundation
Peg out the footprint of the flight with string lines and work out your rise and going on paper first. Excavate the profile, allowing for the foundation depth plus the finished step build-up. Dig a concrete strip footing under the bottom step at least 150mm thick, wider than the steps, on firm undisturbed ground below the reach of frost. Everything above is only as stable as this base, so don’t rush it.
Step 2 — Lay the base and pour the footing
Compact a layer of MOT Type 1 hardcore in the excavation and whack it down firm. Pour and level the concrete footing for the bottom step and let it cure — ideally overnight, longer in cold weather — before you build off it. For a tall flight, each step’s back edge is supported by compacted fill or a concrete core built up behind the risers.
Step 3 — Build the first riser
Set out the front face of the bottom step on the cured footing. Lay your first riser in mortar — one or two courses to hit your chosen rise — checking level in both directions and plumb on the face as you go. Tap each brick down onto a full mortar bed with the trowel handle; don’t leave voids. Keep your bed and perpend (vertical) joints a consistent 10mm.
Step 4 — Fill and lay the first tread
Behind the riser, build up and compact hardcore or a concrete core to just below tread level so the tread is fully supported across its whole area — never leave the middle of a tread spanning a void, or it’ll crack underfoot. Lay the tread bricks (or a stone slab) on a full mortar bed, with a slight forward fall of 2–3mm front-to-back so rain runs off rather than pooling. Check it’s level side-to-side and falls gently forward.
Step 5 — Work up the flight
Each tread’s back edge becomes the base for the next riser. Build the next riser off it, fill and compact behind, lay the next tread, and repeat — constantly re-checking rise, going, level and fall. Consistency is everything: measure every step, don’t eyeball it.
Step 6 — Point the joints
Once the mortar has gone off but before it’s rock-hard, rake out and point the joints with a pointing trowel and jointing iron for a neat, weather-shedding finish. A slightly recessed or “bucket-handle” (concave) joint sheds water well and looks tidy. Well-formed joints are what keep water out of the structure — the main enemy of any outdoor brickwork. Our guide to repointing stone steps and walls covers mortar mixes and jointing technique in detail, and the same principles apply to brick.
Step 7 — Cure, clean and protect
Let the whole flight cure before heavy use — a few days at least, longer in cold or wet conditions, and keep it covered from hard frost while it’s green. Brush off mortar smears. Because even frost-resistant brick benefits from staying drier, some people apply a breathable masonry sealer to slow water ingress and algae — just be sure it’s breathable so trapped moisture can escape.
Common mistakes to avoid
- Using ordinary (F1/F0) facing bricks — the classic error; they spall within a few winters at ground level. Insist on F2 S2 or engineering brick.
- A weak or shallow foundation — brickwork is unforgiving of movement; every cracked joint traces back to the base.
- Spanning a tread over a void — always fill and compact behind each riser so the tread is fully supported.
- No forward fall on the tread — flat treads pool water, which then freezes, spalls the brick and lifts the mortar.
- Sloppy or hollow joints — unfilled bed joints let water into the heart of the step. Full beds, consistent 10mm joints, and proper pointing.
- Uneven rises between steps — the top trip hazard; keep every step identical.
FAQ
What kind of brick should I use for garden steps?
Use frost-resistant bricks rated F2 S2, or engineering bricks for the parts that take the most water and wear (especially treads). Ordinary facing bricks rated F1 or F0 will spall and crumble at ground level after a few British winters. Clay pavers are purpose-made for laying flat and walking on, so they make excellent tread material.
How deep should the foundation be for brick steps?
For a typical garden flight, pour a concrete strip footing at least 150mm thick on compacted MOT Type 1 hardcore over firm, undisturbed ground, below the reach of frost. Taller or retaining flights need a deeper, engineered foundation. The foundation is the single most important part of the build — everything above it is only as stable as the ground below.
Can I lay brick steps over existing concrete?
Yes, if the existing concrete is sound, stable, crack-free and thick enough to act as a foundation, you can build brick risers straight off it in mortar. Check it isn’t hollow, lifting or cracked first, and that it has adequate depth and falls. If the slab is thin, cracked or moving, it’s safer to break it out and pour a proper footing than to build on a base that will shift.
What rise and going should garden brick steps have?
Aim for a rise of 100–150mm and a going (tread depth) of at least 300mm, with 350–450mm feeling more relaxed in a garden. Brick makes the rise easy: one course is roughly 85mm and two courses about 170mm. Keep every step in the flight identical. See our full guide to garden step dimensions for the comfortable ranges and the 2R + G rule.
Should brick garden steps be sealed?
They don’t strictly need it if you’ve used frost-resistant F2 brick and pointed them well, but a breathable masonry sealer can slow water ingress and reduce moss and algae. The critical word is breathable — a film-forming sealer that traps moisture inside the brick can make frost damage worse rather than better. Good detailing (frost-resistant brick, full joints, a forward fall on the tread) does more for longevity than any sealer.
Are brick steps slippery when wet?
Brick has more inherent texture than smooth sawn stone, so it grips reasonably well, but any hard surface can go slick when it’s wet or covered in algae. Choose a textured clay paver for treads, keep them clear of moss and algae, and ensure a forward fall so water drains off. On a shaded, north-facing flight, cleaning regularly matters more than the material — see our guide to removing moss and algae from steps to keep them safe.