Concrete Garden Steps: Ideas, Cost & How They’re Made
How concrete garden steps are made — cast in-situ vs precast, formwork, finishes, cladding options, pros and cons vs natural stone, and rough cost.
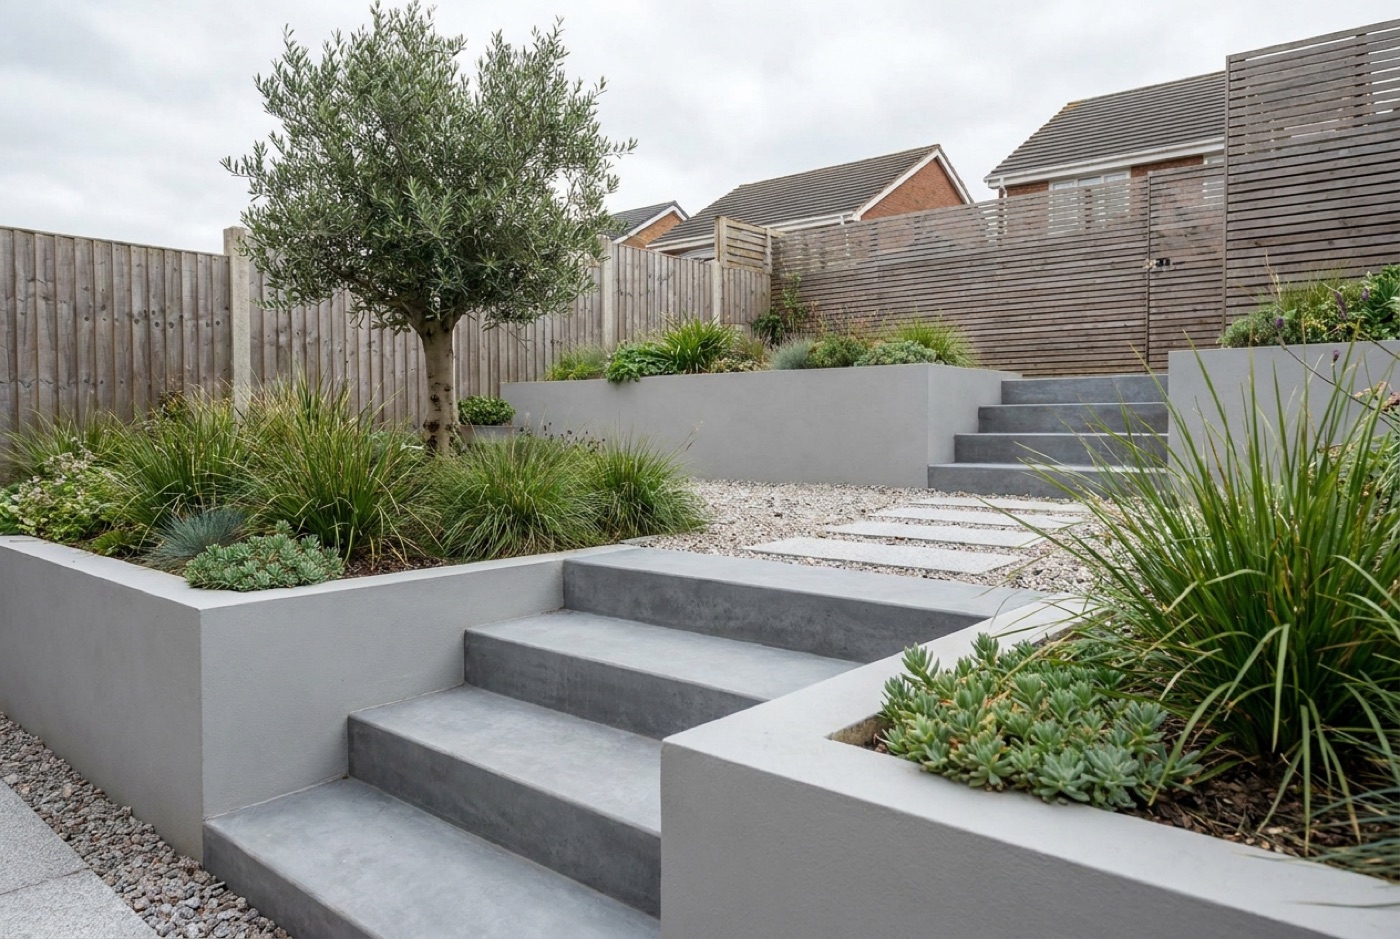
Concrete garden steps are the workhorse of British gardens — strong, adaptable and cheaper than natural stone, whether you pour them on site or drop in precast units. Done well, concrete steps can look every bit as smart as stone; done badly, they read as a grey slab. This guide explains how concrete garden steps are actually made, from cast in-situ versus precast to formwork, finishes and cladding, plus the honest pros and cons against natural stone and a rough idea of cost. If you’re still weighing up materials, our pillar guide to the best stone for garden steps is worth a read alongside this one.
Cast in-situ vs precast concrete steps
There are two very different ways to build in concrete, and picking the right one shapes the whole job.
Cast in-situ (also called poured or in-situ) means building timber formwork on site, pouring wet concrete into it, and letting it cure in place. The steps become one monolithic structure tied into the ground.
- Best for: curved flights, awkward levels, wide staircases and anything you want to look built-in and permanent.
- Pros: no joints, no lifting of heavy units, fully bespoke shape and rise.
- Cons: you only get one shot at the finish; formwork is fiddly; weather and curing time matter.
Precast means the step units — solid blocks or L-shaped “step units” — are cast in a factory or yard and delivered ready to lay on a mortar bed, much like laying oversized bricks.
- Best for: straight, standard flights where speed and predictability matter.
- Pros: consistent quality, fast to install, no formwork or curing wait.
- Cons: limited to stock sizes, visible joints, and the units are heavy to manoeuvre.
| Feature | Cast in-situ | Precast |
|---|---|---|
| Shape freedom | Fully bespoke, curves possible | Stock sizes only |
| Speed | Slower (formwork + curing) | Fast |
| Finish control | High, but one attempt | Factory-consistent |
| Joints | None (monolithic) | Visible between units |
| Best suited to | Curved / wide / custom flights | Straight, standard flights |
For a like-for-like comparison against other materials, see our natural stone vs porcelain vs concrete steps breakdown.
How cast in-situ concrete steps are made
The mechanics are the same as building any set of steps — get the rise and going right first — but the shuttering is what makes or breaks a poured flight.
1. Groundwork and sub-base
Excavate the staircase profile and compact a sub-base of MOT Type 1 hardcore. Every step sits on solid, well-drained ground; skimp here and the flight will crack or sink over its first few winters. For a wide or tall flight, a reinforced concrete footing at the base spreads the load.
2. Formwork (shuttering)
Formwork is the temporary timber (or plywood) mould that holds the wet concrete in shape. For steps you build the sides and the front “riser boards” first, then work up the flight. Key points:
- Use straight, well-braced timber — wet concrete is heavy and pushes hard against the boards.
- Set each riser board with a slight backward lean so the finished nose isn’t undercut, and give each tread a 2–3mm forward fall so rain sheds off.
- Oil the inside faces (or line with release agent) so the boards strip cleanly.
- Check every riser height and tread depth before you pour — you can’t adjust once the concrete goes off.
3. Reinforcement
For anything more than a couple of low steps, cast in steel reinforcing mesh or bar to control cracking, especially where steps cantilever or span soft ground. Keep steel at least 40mm inside the finished face so it can’t rust and spall the surface.
4. The pour
Mix or order a structural concrete (a C25–C30 mix is typical for steps). Pour from the bottom step up, working the concrete into corners and tamping out air pockets. Overfill each tread slightly, then screed level to the top of the formwork.
5. Finishing and curing
While the surface is still “green,” apply your chosen finish (see below). Then let it cure slowly — cover with polythene or damp hessian and leave the formwork on for at least 24–48 hours before striking the sides. Concrete keeps gaining strength for weeks; keep heavy traffic off for a good week.
Concrete step finishes
A bare float finish is where concrete earns its “grey and boring” reputation. The finish is where you buy the look — and, crucially, the grip. A slick trowelled surface is lethal in a wet British winter, so texture matters. Our guide to the best non-slip stone step treads covers slip resistance in more depth, but the same principle applies to concrete: build the texture in.
Brushed (broom) finish
Drag a stiff broom across the setting surface for a fine, consistent texture. It’s the simplest, cheapest way to add grip and hides minor imperfections. The default sensible choice for practical garden steps.
Exposed aggregate
Wash or brush the top layer of cement off before it fully cures to reveal the stones within — a decorative, high-grip finish that reads far more expensive than plain concrete. You can seed special aggregate (flint, granite chippings, coloured gravel) into the surface for a bespoke look.
Board-marked (board-formed)
Line the formwork with rough-sawn timber so the concrete picks up the grain and plank lines. Very on-trend for a contemporary, architectural look — think exposed concrete with visible wood texture. Best for risers and cheek walls rather than tread surfaces, which still need grip.
Polished and power-float
A smooth, refined finish for sheltered or covered steps. Beautiful, but slippery outdoors when wet — reserve it for porches under cover, not exposed garden flights.
Stamped and coloured concrete
Patterned mats press a texture (riven stone, slate, brick) into the surface, and pigments or surface stains add colour. It’s a genuine way to mimic pricier materials, though it can look artificial up close and needs resealing every few years to hold its colour.
Cladding concrete steps with stone or porcelain
One of the smartest moves in garden building is to pour a rough concrete “staircase” as the structure, then clad it with a thin skin of natural stone or porcelain for the looks. You get concrete’s strength and low cost with a premium surface.
- Stone or porcelain treads are bedded on a full mortar bed over the concrete core (never spot-fixed — the unsupported middle cracks underfoot).
- Riser tiles or slips face the vertical fronts.
- Corner / bullnose pieces finish the step nose neatly and safely.
This is a common approach with Indian sandstone and porcelain, and it’s why so many “stone” steps are actually concrete underneath. The core does the structural work; the cladding does the talking. The same full-bed method applies whether you’re facing concrete or laying solid stone — see how to lay stone garden steps for the bedding detail.
Concrete vs natural stone: pros and cons
Concrete and natural stone each have a clear place. Here’s the honest trade-off.
| Concrete | Natural stone | |
|---|---|---|
| Cost | Lower | Higher |
| Shape freedom | Excellent (cast to any shape) | Limited to slab sizes |
| Looks | Good with a considered finish | Naturally characterful |
| Longevity | Decades; can crack/spall | Generations |
| Ageing | Can weather and stain | Patinas beautifully |
| Repairs | Patch or resurface | Replace individual units |
| DIY-friendly | Precast: yes; poured: skilled | Moderate |
Choose concrete when budget is the priority, when you want a curved or bespoke shape, or when you plan to clad it anyway. Choose natural stone when you want a material that ages into the garden and lasts generations, or where the steps are a feature people see up close. For a deeper look at stone options, our best stone for garden steps pillar covers York stone, granite, sandstone and slate side by side.
Rough cost of concrete garden steps
Costs vary hugely with access, ground conditions, height and finish, so treat these as ballpark ranges rather than quotes. As a rule of thumb in a typical UK garden:
- DIY precast step units are the cheapest route — you’re mostly paying for units, mortar and sub-base materials.
- Poured (cast in-situ) steps cost more in labour because of the formwork and curing time, but material cost is modest.
- Clad concrete steps add the price of the stone or porcelain skin on top of a concrete core — still usually cheaper than solid stone for the same look.
- Decorative finishes (exposed aggregate, stamped, board-marked) add cost over a plain brushed finish.
Concrete almost always comes in below solid natural stone for the same flight, which is exactly why it’s so widely used. The biggest variable is nearly always access and groundwork, not the concrete itself — a tricky slope or poor drainage will cost more than the steps.
Common mistakes to avoid
- Too smooth a finish. A power-floated tread is a slip hazard outdoors. Always build in texture.
- No fall on the treads. Flat treads pond water, which freezes and spalls the surface. Give every tread a slight forward fall.
- Skipping the sub-base or reinforcement. The commonest cause of cracked, sunken steps. Compact the ground and reinforce anything substantial.
- Pouring in bad weather. Frost and heavy rain wreck a fresh pour; heat makes it cure too fast and crack. Pick a mild, dry spell.
- Sealing too soon. Fresh concrete needs weeks to cure before sealing. Seal early and you trap moisture.
FAQ
Are concrete garden steps cheaper than stone?
Yes, generally. Concrete — whether poured or precast — usually costs less than solid natural stone for the same flight, and precast units are the cheapest route of all. You can get close to a stone look for less by pouring a concrete core and cladding it with stone or porcelain slips.
Do concrete steps crack?
They can, mainly through poor groundwork, no reinforcement, or water freezing in ponded areas. A compacted sub-base, steel mesh or bar in larger flights, and a slight fall on each tread to shed water prevent almost all cracking. Small surface cracks can be patched; see our guide to repairing stone steps for the general approach, which applies to concrete too.
Can you make concrete steps look like stone?
Yes, in two ways. You can cast and clad the concrete with real stone or porcelain for a genuine stone surface, or use stamped and coloured concrete to imitate riven stone, slate or brick. Cladding looks the most convincing up close; stamped concrete is cheaper but can look artificial and needs periodic resealing.
How long do concrete garden steps last?
Well-built concrete steps last for decades. They won’t outlive good natural stone, which can last generations, but with a solid base, reinforcement and a sealed weatherproof finish, a poured flight will comfortably serve most of a garden’s lifetime. Longevity comes down to groundwork and drainage more than the concrete.
Should I pour concrete steps or buy precast units?
Choose poured (cast in-situ) for curved, wide or bespoke flights where you want a seamless, built-in look. Choose precast units for straight, standard flights where speed and predictable quality matter and you want a more DIY-friendly job with no formwork or curing wait.
Do concrete garden steps need sealing?
It helps. A breathable concrete sealer reduces staining, resists frost damage and keeps the surface looking fresh, particularly on decorative or coloured finishes. Wait until the concrete has fully cured — several weeks — before sealing, and reseal every few years. The same care that keeps stone steps looking good applies here; our advice on cleaning stone steps and patios translates directly to concrete.