Garden Stepping Stones: Ideas, Materials & How to Lay Them
Garden stepping stones ideas, materials and spacing — plus how to lay them flush in a lawn or gravel so a mower rides straight over, with cost and care tips.
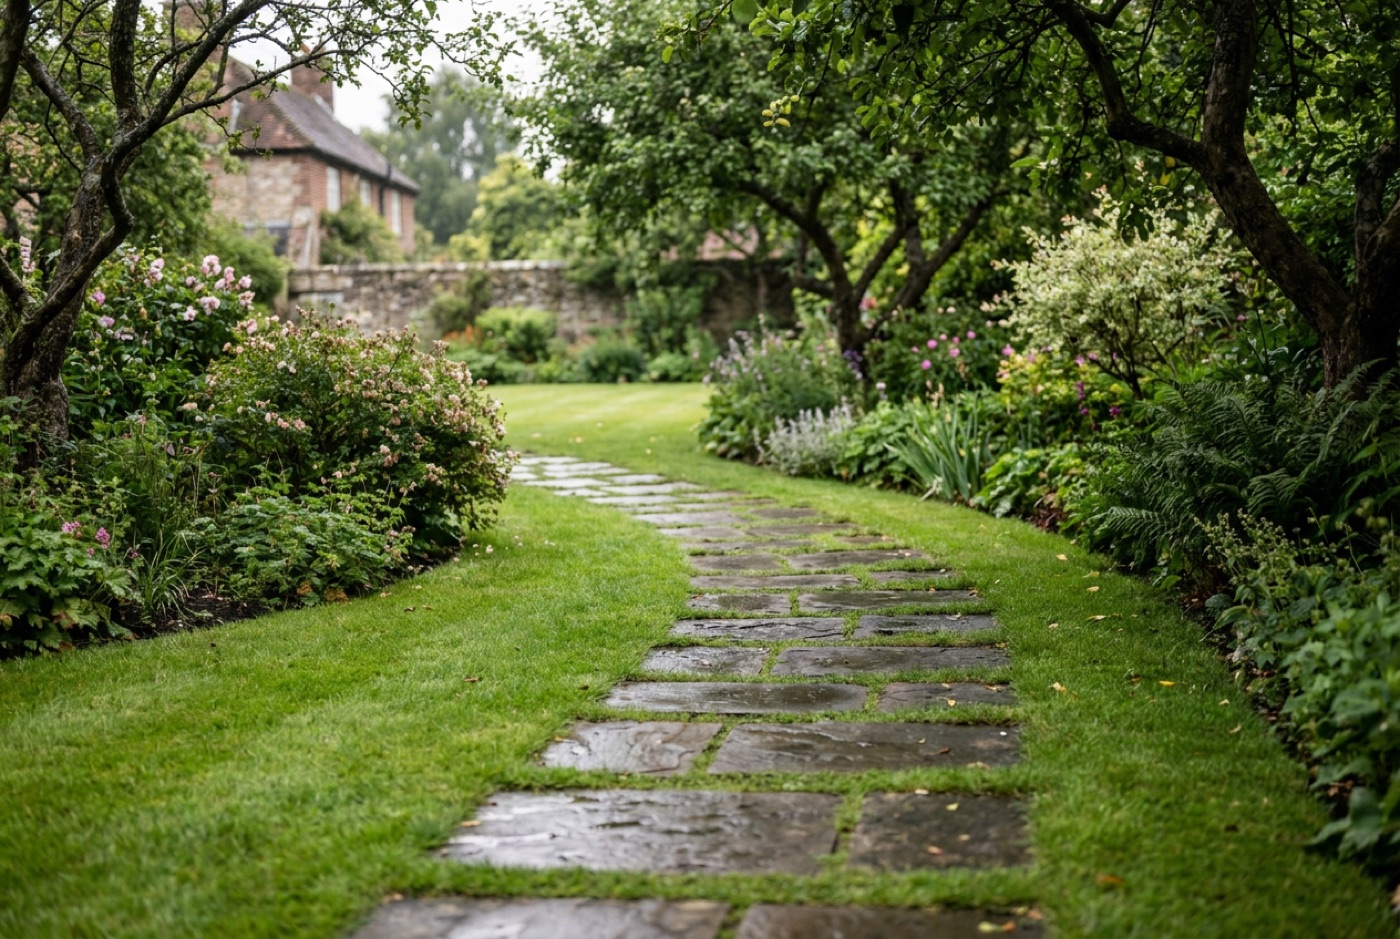
Garden stepping stones are the quiet workhorse of good garden design: a run of individual slabs that carries you across a lawn, through a border or over gravel without the cost, commitment or bulk of a full paved path. Done well, they read as a deliberate, almost invisible route — feet find them naturally and the eye follows the line round a corner. Done badly, they become a set of wobbly, mud-rimmed islands you tiptoe between after rain. The good news is that getting them right is mostly about three things: choosing a material that suits the setting, spacing them to a comfortable stride, and setting them flush so a mower rides straight over the top. This guide covers all three, plus ideas for lawns, gravel and borders, realistic costs and how to keep them looking good.
Why choose garden stepping stones over a solid path?
A continuous path is the right answer for a busy, everyday route — the way to the bins, the front door, the washing line. Garden stepping stones earn their place everywhere else. They let you cross a lawn without carving it in two, protect the grass along a well-trodden desire line, and keep a garden feeling green and open rather than hard-landscaped.
They’re also forgiving. Because each slab is independent, you can follow a curve, skirt a tree or dogleg round a border far more easily than you can with a solid run of paving. They’re cheaper — you’re buying a fraction of the stone — and a genuinely achievable weekend job for a confident DIYer.
The trade-off is that stepping stones suit a walking pace, not a wheelbarrow or a buggy. If you need to run a mower, a bike or a bin over the route regularly, a solid path wins. For a proper paved route, our garden path ideas round-up covers materials and layouts in depth; for level changes, see our garden steps ideas.
Garden stepping stone ideas by setting
The best stepping-stone scheme starts with where the stones are going. The setting dictates the material, the spacing and how you set them.
Across a lawn
The classic use, and the one most people picture. Individual slabs set flush into the turf make a route that keeps the whole green sweep of the lawn intact. Space them to a relaxed stride, follow a gentle curve rather than a rigid straight line, and the effect is timeless.
The golden rule here is to set every stone level and just below the grass so the mower blades pass safely over the top. A slab proud of the lawn is a scalped patch of grass and a wrecked blade waiting to happen.
Through gravel
In a gravel garden, larger stepping stones give the eye — and the feet — somewhere firm to land, and stop shingle spilling into the house on the soles of your shoes. Big, chunky slabs work best here: they anchor visually against the loose gravel and won’t shift. Bed them properly rather than just resting them on top, or they’ll rock and sink over time.
Winding through a border
A few slabs threaded through a deep border turn an unreachable bed into a maintainable one — you can get in to weed, prune and plant without compacting the soil or trampling perennials. Tuck the stones slightly under the foliage so they half-disappear in summer and reappear as a tidy route in winter.
Across a pond or bog garden
Substantial stones set on firm piers over shallow water or a bog garden make a dramatic crossing. This is a job to take seriously — the stones must sit on solid, stable supports, not soft mud — but the pay-off is one of the most enjoyable features in any garden.
As a “float” over planting or ground cover
Set stones amongst low, creeping ground cover — thyme, chamomile, mind-your-own- business — and let the planting knit around and between them. The stones appear to float in a sea of green, and brushing past the herbs releases their scent. Reserve the planted joints for a low-traffic, decorative route where the plants can survive.
Material options for garden stepping stones
Stepping stones don’t all have to be “stone” in the strict sense. Here are the main options, what they suit and what to watch for.
| Material | Look | Best for | Watch out for |
|---|---|---|---|
| Natural stone (sandstone, York, slate, granite) | Characterful, weathers beautifully | Lawns, borders, quality schemes | Porous types hold algae — seal them |
| Cast concrete slabs | Uniform, budget-friendly, huge range | Long runs, modern gardens, DIY | Can look flat until it weathers |
| Riven concrete “stone-effect” | Mimics riven stone at lower cost | Budget lawns and paths | Colour can fade; quality varies |
| Porcelain pavers | Crisp, modern, near-zero absorption | Contemporary and gravel gardens | Needs a full mortar bed, not just soil |
| Log rounds / timber discs | Rustic, natural, cheap | Woodland and cottage corners | Gets slippery; rots eventually |
Natural stone
The premium choice, and hard to beat for a garden that’s meant to look established. Riven sandstone — including Indian sandstone and reclaimed York stone — has a naturally textured face that grips underfoot and only improves with age. Slate brings a moody, near-black depth; granite is the toughest of all and shrugs off frost. The catch with most natural stone is that it’s porous: without sealing, it holds water and glazes over with algae. For a route that stays safe and clean, treat it as you would steps and read our guide to the best stone sealers for steps and patios.
Cast concrete slabs
The default for good reason: cheap, widely available in a huge range of sizes, colours and textures, and dead easy to work with. Plain concrete can look a little flat when new, but it weathers and greens down within a season or two. “Stone- effect” riven concrete gives you a convincing natural look at a fraction of the price — ideal for a long run where buying natural stone would be eye-watering.
Porcelain pavers
If your patio is already porcelain, matching porcelain stepping stones carry the look seamlessly into the garden. Porcelain barely absorbs water, so algae struggles to take hold, and a textured (R11) finish keeps grip in the wet. The one caveat is fitting: porcelain won’t bond to soil, so it needs bedding on a full mortar bed — it’s less of a plonk-it-in-the-lawn job than sandstone.
Log rounds and timber discs
Thick hardwood log rounds sunk into the soil make charming, near-free stepping stones for a woodland or cottage corner. They’re beautiful and informal — but they get genuinely slippery when wet and will eventually rot, so keep them to a dry-weather, low-traffic route and expect to replace them in time.
Spacing and stride: the detail everyone gets wrong
This is where most DIY stepping-stone schemes fall down. Space the stones by eye “so they look about right” and you end up with a route that forces an awkward, mincing gait or an unnatural lunge.
The fix is to walk the route before you fix anything. Lay the stones loose on the grass or gravel, then walk it at a normal, relaxed pace — several times, in both directions — and shuffle the slabs until each one lands naturally under the ball of your foot.
As a starting point for an average adult:
- Centre-to-centre spacing of around 550–600mm suits a comfortable natural stride. This is the measurement that matters — not the gap between the slabs.
- A gap of roughly 100–200mm between the slabs themselves, depending on how big the stones are.
- Slabs of at least 400mm across so the foot lands squarely, with no need to aim.
A few sanity checks:
- Test the stride with the shortest regular user of the garden, not just yourself — children and older relatives take smaller steps.
- On a slope, tighten the spacing; people take shorter steps going up and down.
- Keep the spacing consistent along the run. An inconsistent rhythm is exactly what trips people, the same principle that governs garden step dimensions.
How to lay garden stepping stones (flush with the lawn)
Here’s the summary method for the most common job — setting slabs into a lawn so a mower rides straight over them. It’s a genuine half-day task for a small run. For the full step-by-step, including gravel and mortar-bedded versions, see our dedicated guide on how to lay stepping stones.
1. Set out and walk the route. Lay all the stones on top of the lawn first, adjust for stride as above, and only mark their positions once the whole run feels right underfoot.
2. Cut the turf. Using a stone as a template, cut around it with a spade or an old knife and lift out the turf and a little soil beneath — dig about 40–50mm deeper than the slab is thick to allow for a bedding layer.
3. Add a bedding layer. Put down 30–40mm of sharp sand (or a dry sand-and- cement mix for a firmer set), and level it. Bedding on sand or mortar — rather than straight onto soil — is what stops the stones rocking and sinking later.
4. Set the stone flush, or just below. Lower the slab in, then tap it down with a rubber mallet until its top sits level with, or a few millimetres below, the surrounding grass. This is the single most important step: a stone set proud of the lawn will catch the mower blades. Below the grass, the mower sails over it.
5. Check level and firm in. Use a spirit level across and along each stone. Add a tiny forward or sideways fall if the stone tends to pool water. Firm the turf back around the edges so there’s no lip to catch a toe or a mower wheel.
6. Repeat and settle. Work along the run, re-checking your stride as you go. Water the disturbed turf and leave the stones a few days to settle before heavy use.
The mower rule in one line: if you can run the lawnmower over the finished stones without lifting it, catching a blade or bumping a wheel, you’ve set them at the right height.
How much do garden stepping stones cost?
Stepping stones are one of the cheapest ways to add a proper route to a garden, precisely because you buy so few slabs. The cost splits into the stones themselves, the bedding materials and — if you’re not doing it yourself — labour.
- Cast concrete slabs are the budget end: individual stepping-stone slabs are inexpensive, and a stone-effect riven finish costs a little more.
- Natural stone — riven sandstone, slate, granite setts — sits well above concrete, with reclaimed York stone at the top for character.
- Porcelain is priced with natural stone, and adds the cost of a full mortar bed and adhesive.
- Bedding materials (sharp sand, a bag of cement) are minor for a short run.
- Labour, if you hire a landscaper, is modest for a straightforward lawn run but rises sharply for pond crossings, cut curves or mortar-bedded gravel work.
Because you’re covering a route rather than a whole surface, even natural stone stepping stones come in far cheaper than paving the same line solidly — one of the main reasons to choose them. If you’re weighing materials for a bigger project too, our guide to the best stone for garden steps compares the same materials on cost and durability.
Maintaining garden stepping stones
Stepping stones are low-maintenance, but they’re not no-maintenance — mostly it’s about grip and keeping them from disappearing.
- Keep them clear of moss and algae. Slabs in shade or under trees green over and turn slippery. A stiff brush and a gentle clean once or twice a year keeps them safe; our guide on how to clean stone steps and patios covers doing it without damaging the stone.
- Reset any that sink. Over a few seasons a stone may settle or lift with frost. Lift it, top up the bedding sand and re-set it flush — a five-minute fix.
- Trim the edges. Grass creeps over the slabs and gravel migrates onto them. An occasional trim or sweep keeps the route crisp and the full stone underfoot.
- Seal porous natural stone. A sealer slows algae and stops the stone glazing, which is both a looks and a safety win.
Grip is the thing to stay on top of. A wet, mossy stepping stone is one of the easiest ways to come a cropper in a garden, so treat regular cleaning as a safety task, not just a cosmetic one.
FAQ
How far apart should garden stepping stones be?
Aim for around 550–600mm centre to centre for an average adult stride — that’s the distance between the middle of one stone and the middle of the next, which matters more than the gap between the slabs. Always lay them out loose and walk the route first, adjusting until each stone lands naturally under the ball of your foot. Tighten the spacing on slopes and for shorter users such as children.
How do you lay stepping stones so you can mow over them?
Set each stone level with, or slightly below, the surrounding grass. Cut the turf to the slab’s shape, dig out enough to add a 30–40mm bedding layer of sharp sand, then tap the stone down flush with a rubber mallet. Firm the turf back around the edges so there’s no lip. Set correctly, the mower rides straight over the top without catching a blade.
Can you lay stepping stones directly on soil or grass?
You can, but they’ll rock, sink and tilt within a season. Always bed them on a 30–40mm layer of sharp sand or a dry sand-and-cement mix in a shallow excavation. The bedding layer is what gives a stable, flush, long-lasting result — it’s five extra minutes per stone and well worth it.
What is the best material for garden stepping stones?
For most gardens, riven natural sandstone offers the best mix of grip, looks and longevity, and it weathers beautifully. Cast concrete is the budget choice and comes in convincing stone-effect finishes. Porcelain suits modern schemes and resists algae but needs a mortar bed. Match the material to the setting and your budget — see our best stone for garden steps guide.
How big should garden stepping stones be?
Choose slabs of at least 400mm across so a foot lands squarely without aiming; 450–600mm is more comfortable still and reads better in gravel. Bigger stones also sit more stably and are less likely to shift underfoot. Very small “stepping stones” force people to look down and place their feet carefully, which defeats the point of a natural, easy route.
How do you stop stepping stones getting slippery?
Keep them clear of moss and algae with a stiff brush and an occasional gentle clean, especially on shaded or under-tree runs. Choose a naturally textured or riven finish rather than a smooth one, and seal porous natural stone to stop it glazing over. Our guide on how to clean stone steps and patios covers safe methods that won’t damage the surface.